

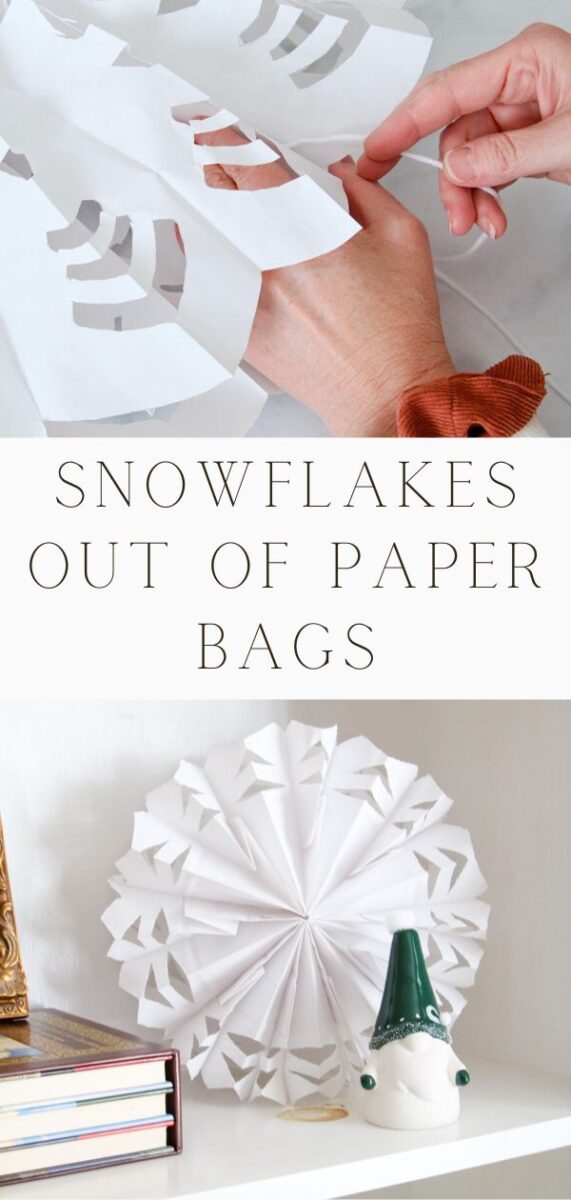
Here are step-by-step instructions on how to make snowflakes out of paper bags. You can use this DIY snowflake tutorial to make any size and color as long as you are using paper bags.

Last Christmas, while visiting my daughter, she showed me an Instagram post where someone took brown lunch bags and made snowflakes. It was so cute! I wish I could remember where we saw it so I could share it with you. Anyways, we just had to make these adorable lunch bag snowflakes too.
We laughed and giggled while gluing bags together and cutting different shapes into the bags. Making paper snowflakes is an easy craft and a great family project!
After finishing the project, I made a YouTube video on making paper bag snowflakes, but I ran out of time to write a post so guess what? Yep! you guess it — today's post is about how to make snowflakes out of paper bags.
This post contains affiliate links, meaning I receive a commission if you purchase using the links below at no extra cost to you. All opinions are all my own.
How Do You Make Snowflakes with Paper Bags?
Making snowflakes with paper bags is easier than you think! I will show you how to make easy paper bag snowflakes in just six simple steps using items you probably already have at home.
Gather Your Supplies
- Paper lunch bags (you can use any brown paper bags, but in this case, I used white paper bags)
- Glue sticks
- Yarn or twine
- Scissors
- Pencil
- Patterns (optional) (Subscribe to Life on Summerhill to get access to this printable pattern)
- Stapler
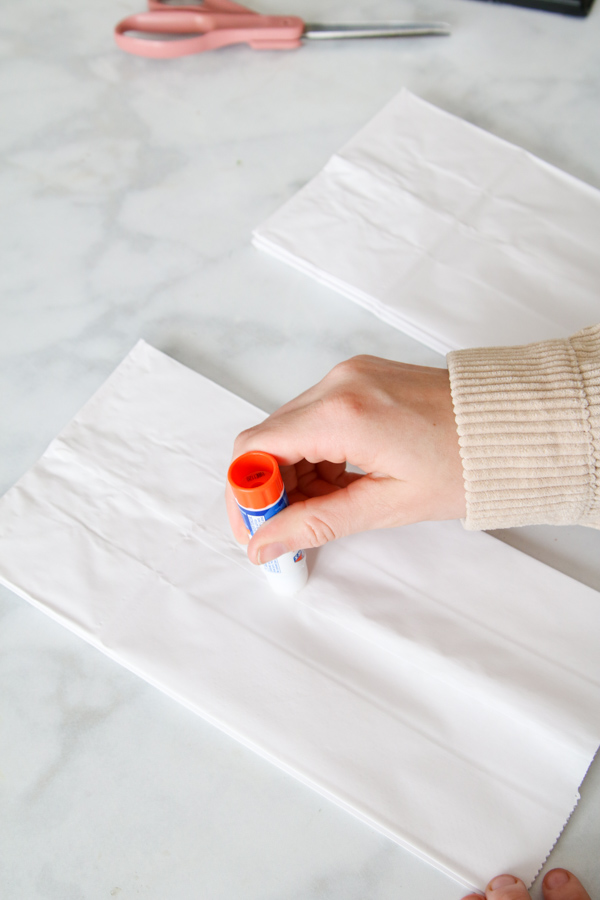
Step 1: Glue Paper Bags Together
I'm using white paper lunch bags for my snowflakes today. Begin by drawing a T shape on the bags with a glue stick. The top of the T should be along the bottom of the bag.
Draw a straight line of glue to the open end of the bag. Place another bag on top, repeat this step with the next bag, and continue until you have nine bags glued together. The glue lines should line up on the same sides of the paper bags.

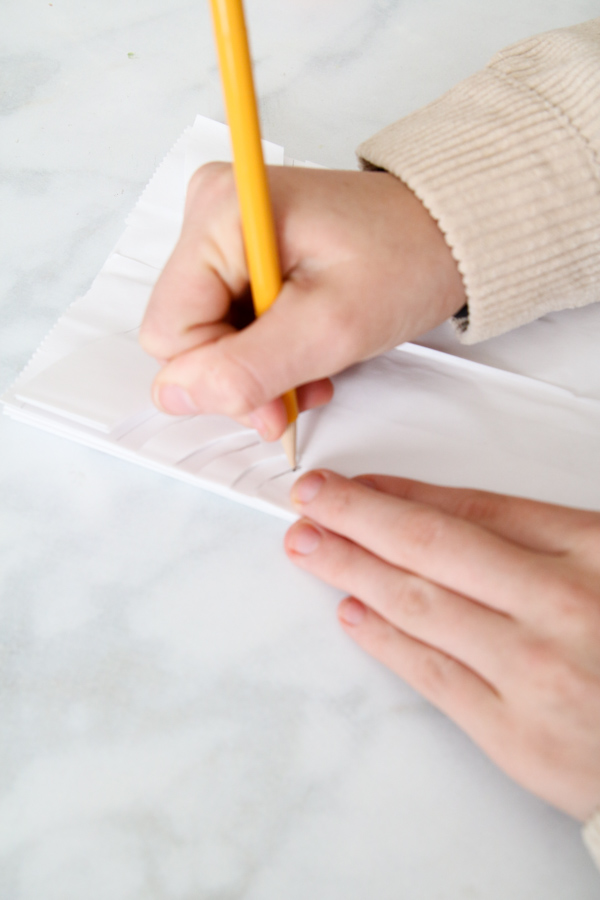
Step 2: Draw The Snowflake Pattern
Next, print and cut out the snowflake pattern if you plan to use them. Using a pattern is a great way to get a symmetrical design.
I found a pattern for the easiest way to make snowflakes out of paper bags, so I made them available to everyone. I offer free snowflake patterns in my subscriber-exclusive printable library. To access this library, click subscribe to our newsletter to access the snowflake patterns under the Christmas section.
Cut the pattern from the printed piece of paper and then place the pattern on the bags and trace the design.

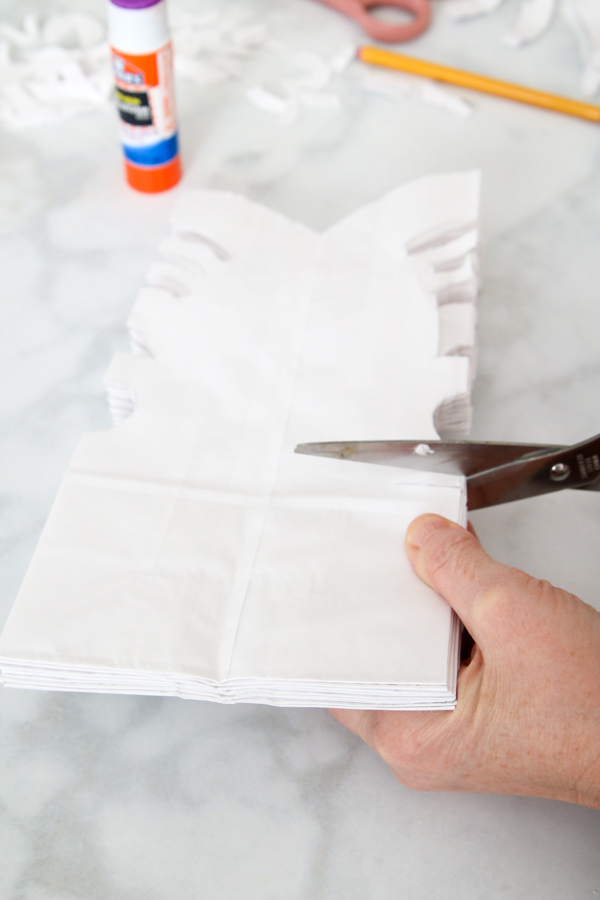
Step 3: Cut Out the Snowflake Pattern
For the next step, cut out the design from the entire stack with scissors. It helps to use a good pair of very sharp scissors. It doesn't have to be perfect, just get it as close as you can.

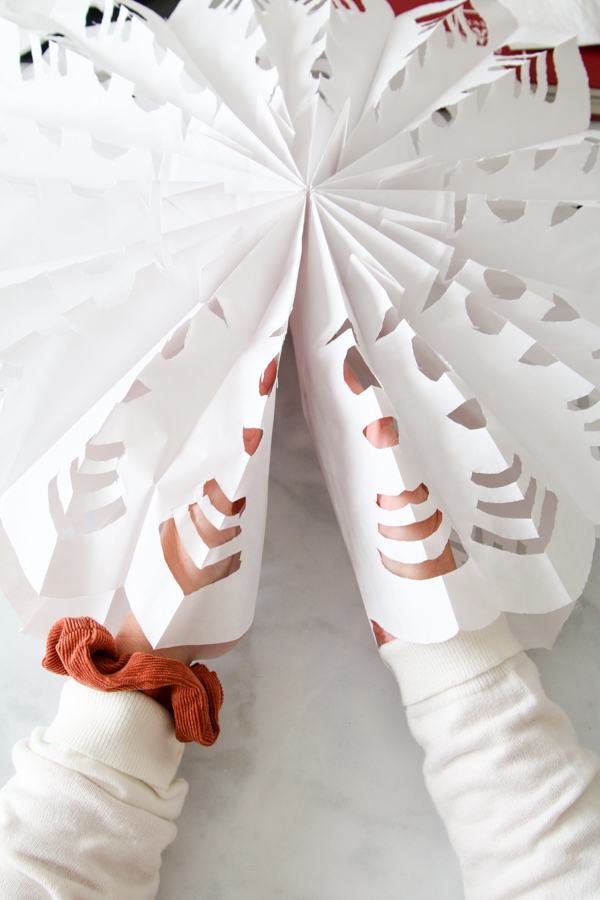
Step 4: Open the Snowflake
Unfold the bags from the top and if any of the sides of the bags are not stuck together, secure them with your glue stick or hot glue gun. Open your snowflake, bringing it all the around.
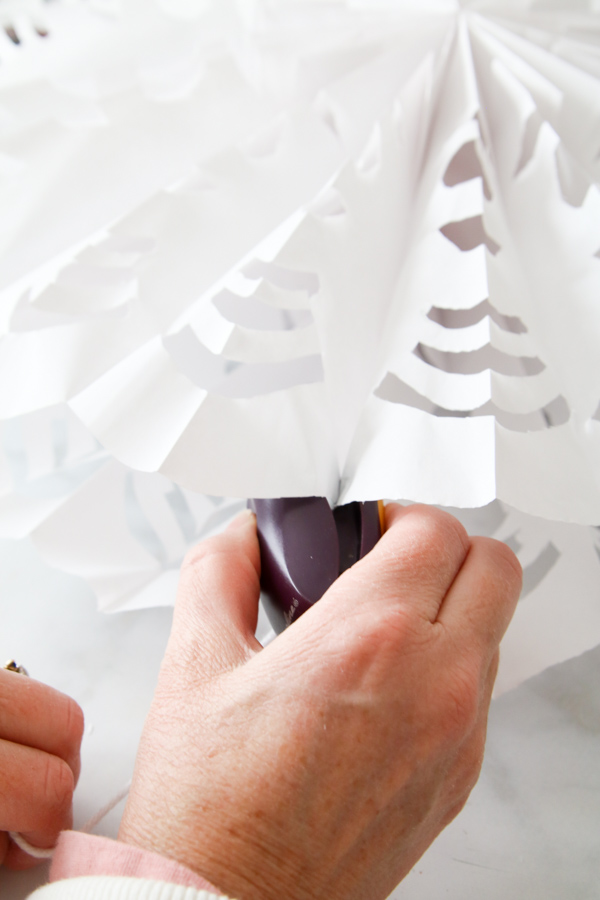
Step 5: Add Twine or Yarn to the Snowflake
If it looks good, bring your snowflake back together. Cut a piece of twine or yarn about 24 inches long. Once again, apply glue in a T shape, open the snowflake, and put your hands inside the top of the bag on each end to press them together, adhering the glue.

Step 6: Staple Twine or Yarn in Place
Place the end of the string or yarn on the glue and staple it together. Your DIY paper bag snowflakes are almost done.

That's it! You now have a beautiful giant snowflake. I hope you enjoyed this DIY Christmas craft. Now that you have the hang of it, you can try making more in different designs using different patterns.
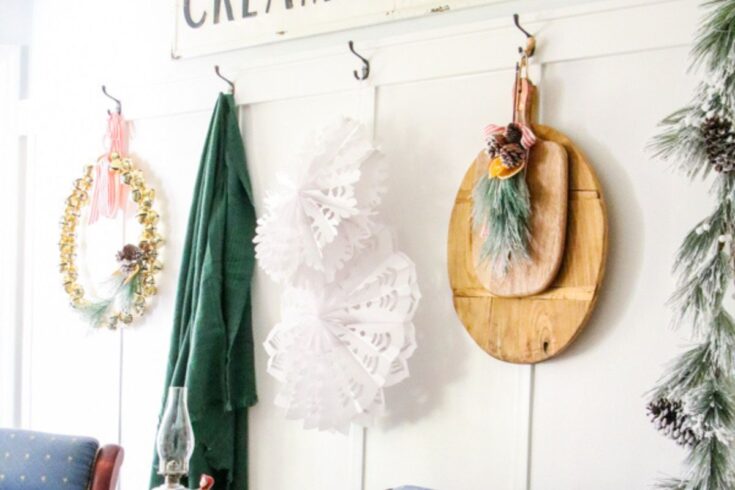
How to Decorate with Your Snowflakes
Now for the best part! There are many ways to decorate with your snowflakes this holiday season. You can set the snowflakes up on your bookcase; all you need to do is not include the string.


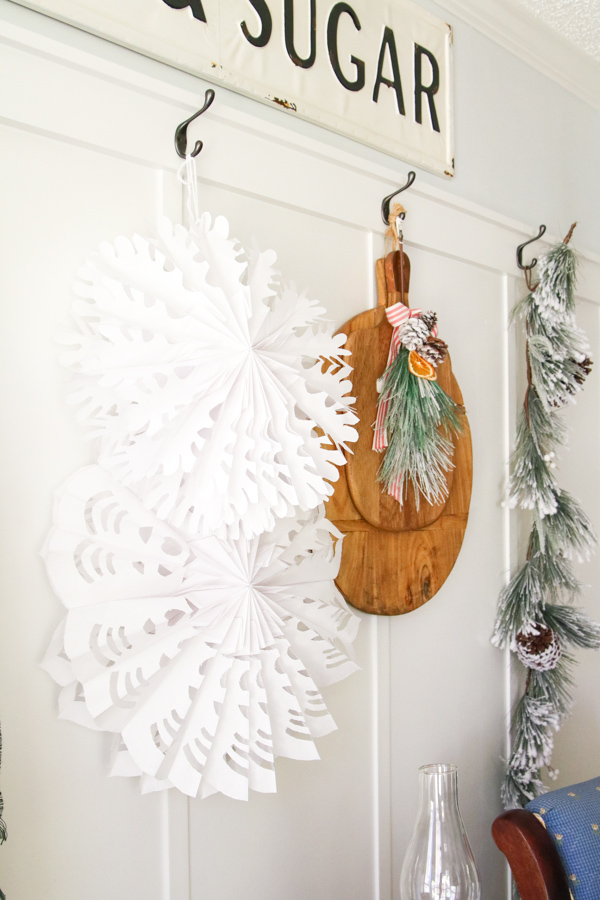
Do you like the red and white snowflake? You can make that using popcorn bags. I got mine at Dollar Tree and cut out the word “popcorn.” It makes a slightly smaller version than the white paper bag snowflakes.
As I did here, you could also hang them from a coat hook. Or you can use a command hook to hang them on a wall.


Try hanging your snowflake from the ceiling or as window decorations. Consider weaving fairy lights through them. They'd also be a cute and inexpensive way to turn a child's room into a winter wonderland. You can use different sizes of bags to create different size snowflakes for your winter decor.
Final Thoughts
What do you think? Are you ready to try to make these adorable snowflakes? I think this is such a fun craft!
I'd love to hear how you decide to decorate when you make snowflakes out of paper bags. For more fun Christmas DIY decor projects, try these ideas:
And if you are looking for Christmas decor ideas, check out my ideas for blue Christmas decorations with a vintage flair or learn how to create simple farmhouse Christmas mantel. Merry Christmas and Happy New Year!
Happy Decorating!


If you enjoyed this post, sign up to receive new decor ideas each week. FREE EMAIL SUBSCRIPTION
How to Make Snowflakes Out of Paper Bags

Here are step-by-step instructions on how to make snowflakes out of paper bags.
Instructions
- Begin by drawing a T shape on the bags with a glue stick. Place another bag on top and repeat this step until you have 9 bags glued together.
- Next, print and cut out the patterns if you plan to use them. Cut the pattern out on an extra paper bag. Place pattern on bags and trace the design.
- Cut out the design with scissors. It helps if your scissors are very sharp. It doesn't have to be perfect, just get it as close as you can.
- Unfold the bags from the top and if any of the bags are not stuck together, secure them with your glue stick. Open your snowflake, bringing it all the around.
- If it looks good, bring your snowflake back together. Cut a piece of twine or yarn about 24 inches long. Once again, apply glue in a T shape, open the snowflake, and put your hands inside each end to press them together, adhering the glue.
- Place the end of the string or yarn on the glue and staple it together. That's it! You now have a beautiful snowflake.
Notes
I offer free snowflake patterns in my subscriber-exclusive printable library. To access this library, go to https://lifeonsummerhill.com/subscribe. Subscribe to our newsletter to get access to the snowflake patterns under the Christmas section.