If you love homemade Christmas decor then you will love this DIY bottle brush tree that is made with yarn. This is an easy project using a few tools and looks adorable with your holiday decorations.
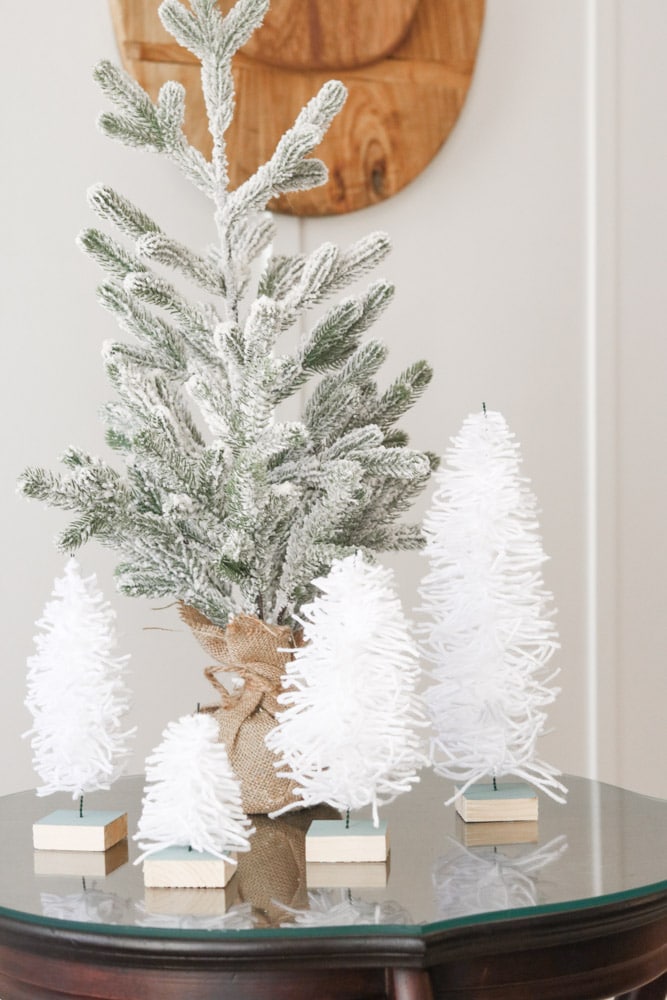
In our house, we love making homemade Christmas decorations like this apple candle village but last year we used store-bought bottle brush trees so this year I decided to make our own and share a DIY bottle brush tree tutorial for you.
This post contains affiliate links, meaning I receive a commission if you purchase using the links below at no extra cost to you. All opinions are all my own.
DIY BOTTLE BRUSH TREE
These are not your usual bottle brush trees because we used what we had on hand which was yarn so if you have yarn lying around and these other supplies below let's get started making these mini bottle brush Christmas trees.
WHAT YOU NEED TO MAKE A YARN BOTTLE BRUSH TREE
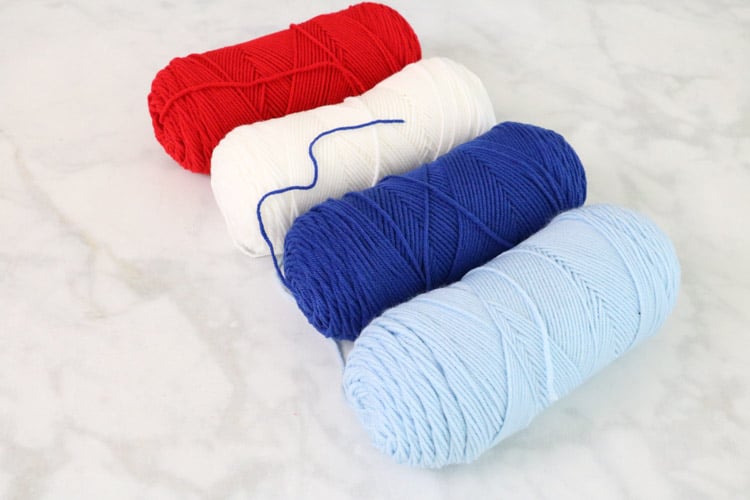
- Yarn
- 2″ x 2″ piece of wood or bottle cork
- Scissors
- Floral wire
- 2 vice grips or locking pliers
- Wire cutters
HOW TO MAKE MINI BOTTLE BRUSH TREE
Now that you know what supplies you will need to make a yarn tree let's get started with the first step. You can find all of these supplies and more at Hobby Lobby, Dollar Tree, or any local craft store or dollar store.
Step 1: Wrap Yarn Around Hand
Begin by laying a piece of the floral wire on the table and then wrapping yarn around your hand 50 times. I used a piece of floral wire that was 12″ long and cut it in half. I laid one piece of wire on the table.
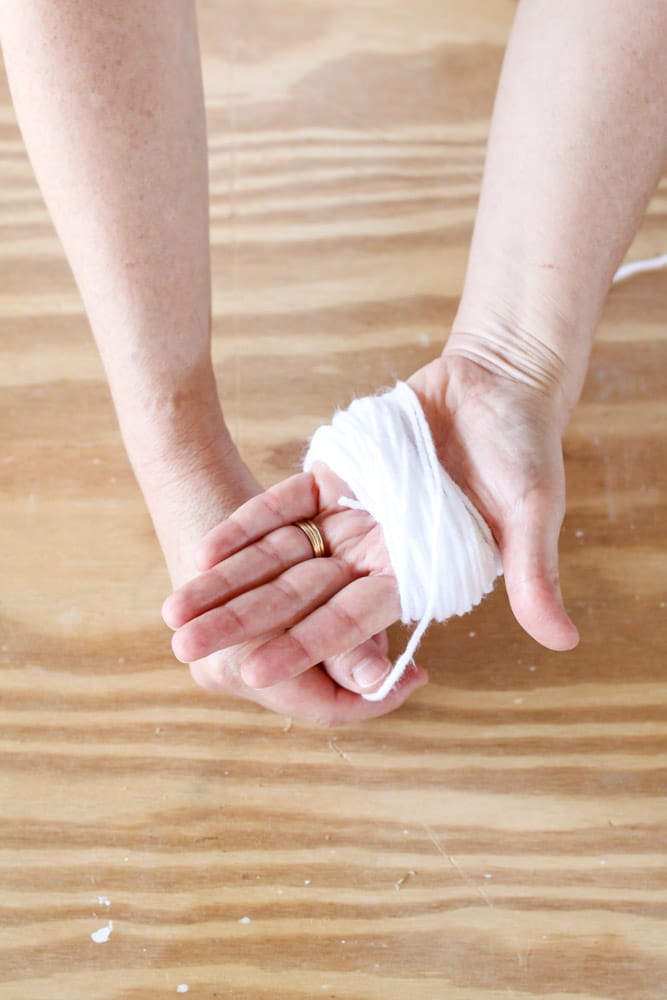
Step 2: Cut the Yarn from your Hand
Once you have finished wrapping the yarn around your hand cut the ends and then each side of the yarn.
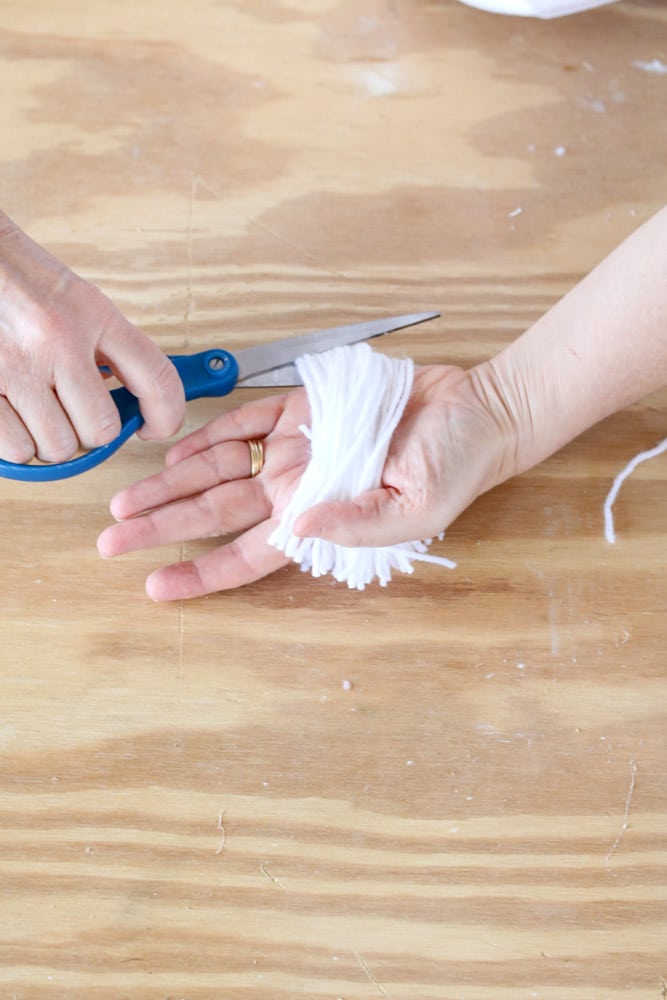
Step 3: Lay the Yarn Flat on the Floral Wire
Next, gently lay all the cut pieces of yarn onto the center of the piece of wire that is laying on the table and place the other piece of floral wire on top.
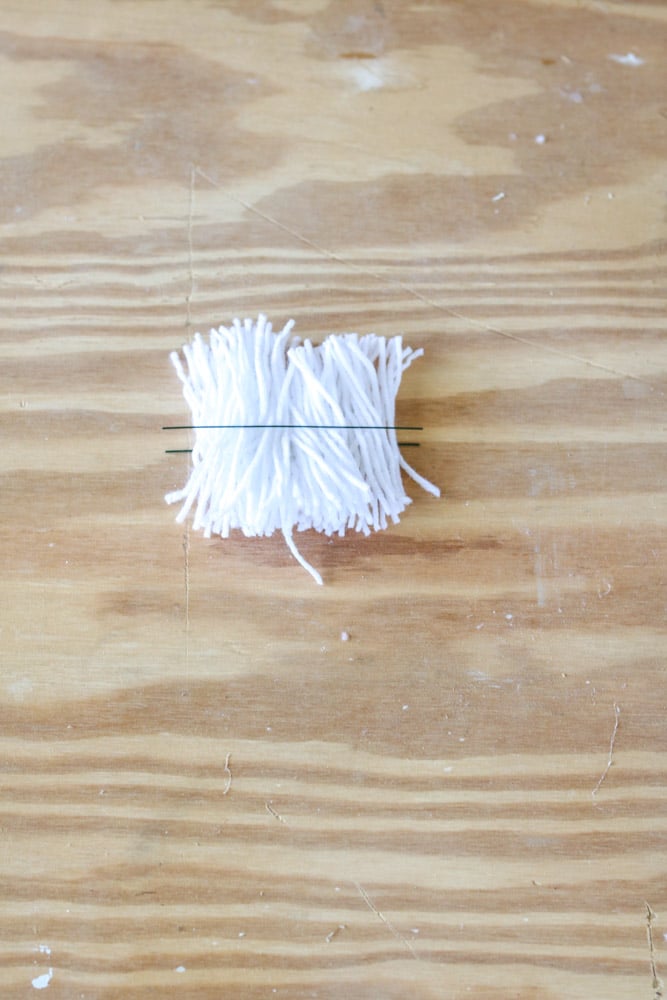
Step 4: Twist the Floral Wire
Now grab both locking pliers and clamp them to each end of the floral wire. Begin twisting the wire in opposite directions.
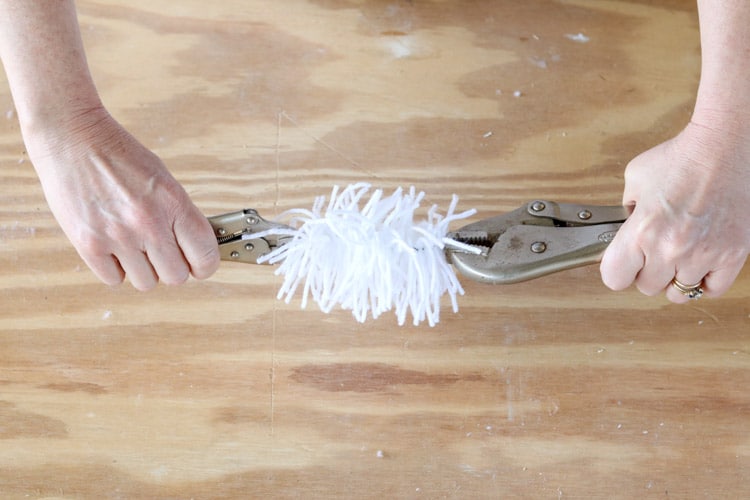
Twist the wire as much as you like. My floral wire didn't seem to have an end in sight so I kept twisting until the fluffiness was where I wanted it to be.
Now remove the locking pliers and give the yarn tree a shake upside down.
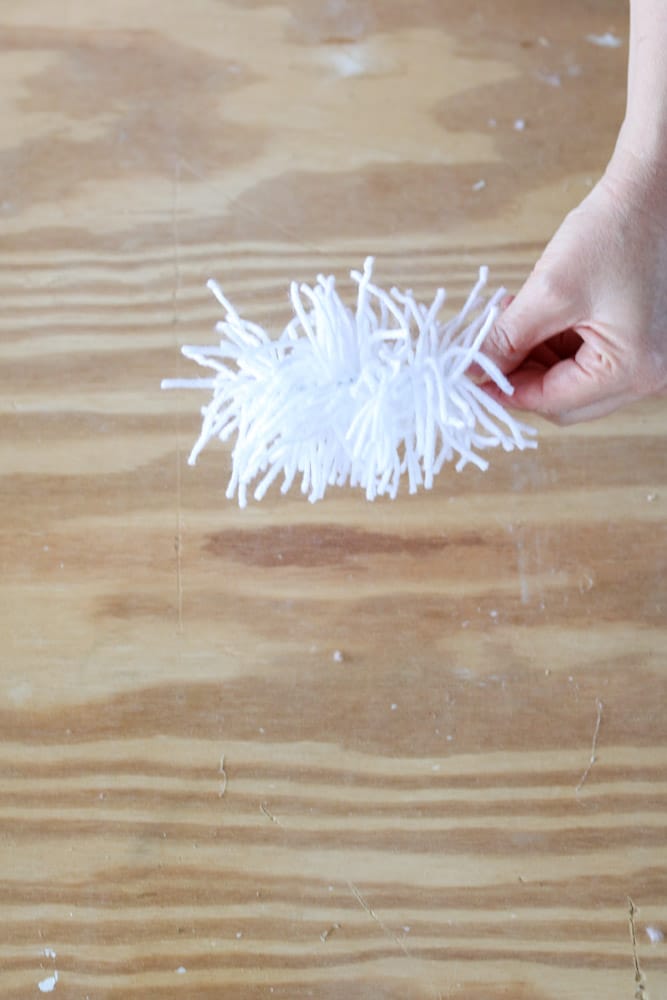
Step 5: Prepare the base for the DIY bottle brush trees
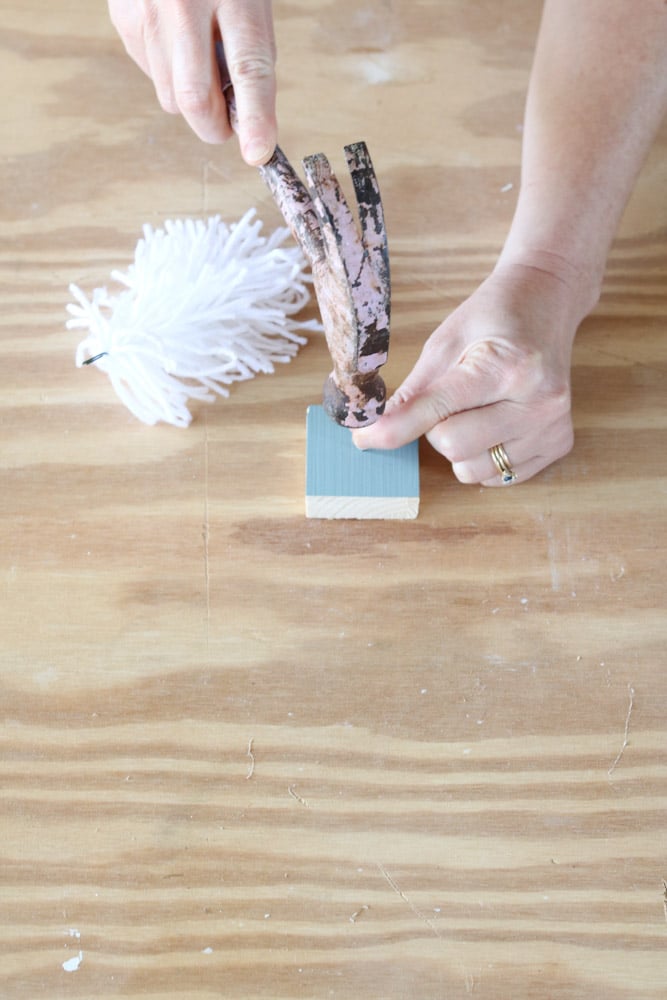
Next, take a nail that is about the same size as the end of the twisted floral wire and drive it into the square piece of wood about half an inch down but don't make a hole all the way through the wood.
I had a piece of painted wood leftover from another project so I cut it to size. This is why my Christmas tree base is painted a blue-green color to add a little color to these white bottle brush trees. I think this makes a cute little tree trunk like look for our white trees.
The chalk paint color is a Dixie Belle paint called vintage duck egg.
Step 6: Place Bottle Brush Tree in the Base
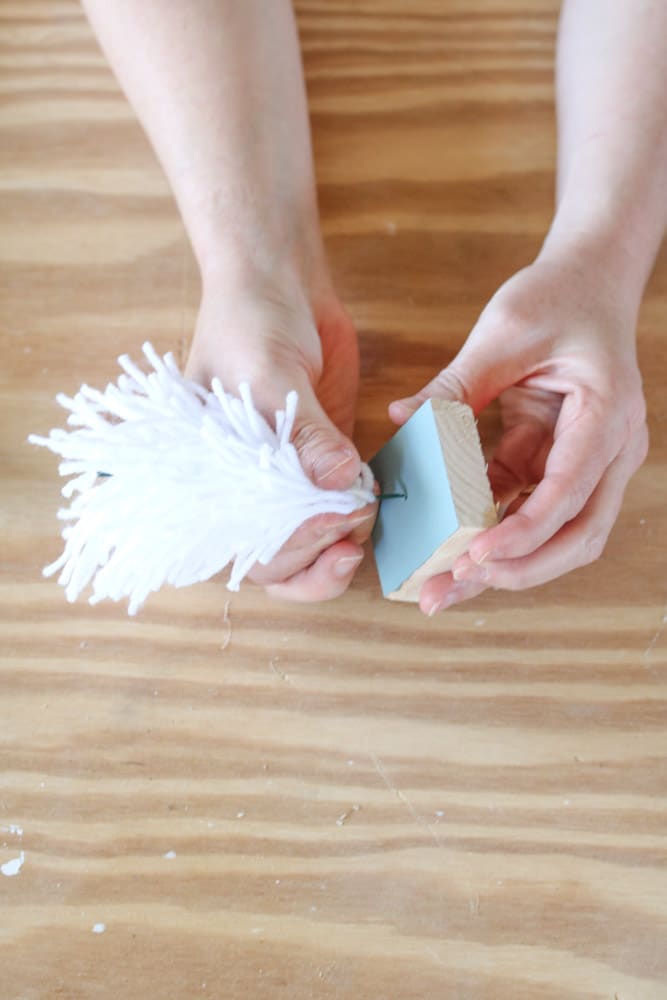
Now simply slide the wire base into the hole. If your base hole is too big and your tree base is loose simply drop a little glue down in the hole and prop the tree up straight until it dries.
Step 7: Trim your Yarn Christmas tree
This is probably my favorite part because now is when your tree takes shape.
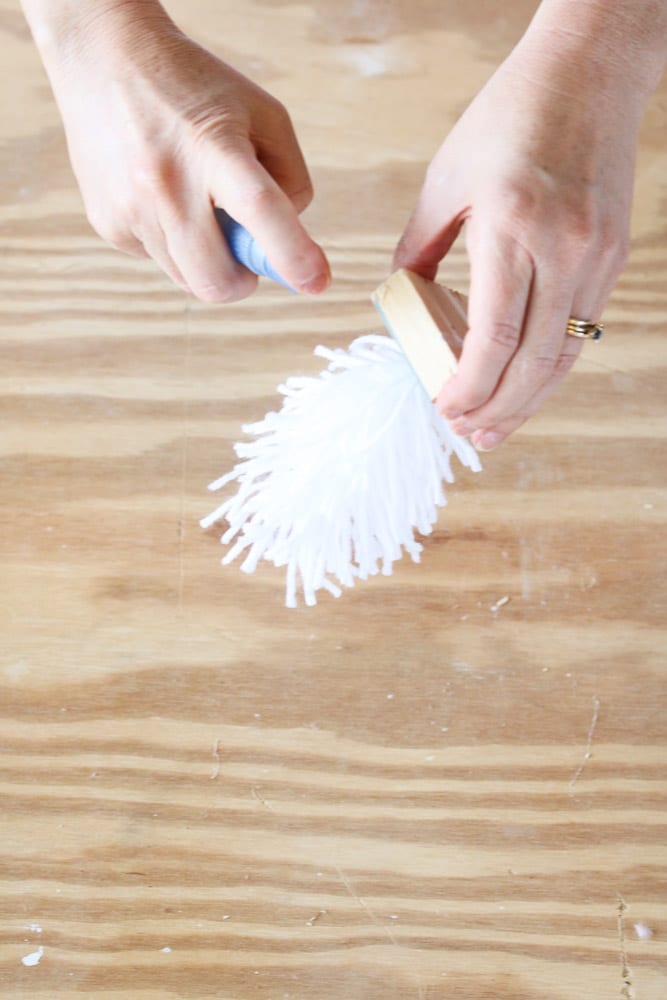
Turn your tree upside down and spray it with hair spray. The type of hair spray I used is an inexpensive hairspray called Suave. Hold it upside down until it dries. I even shook it a little as I was spraying and cutting.
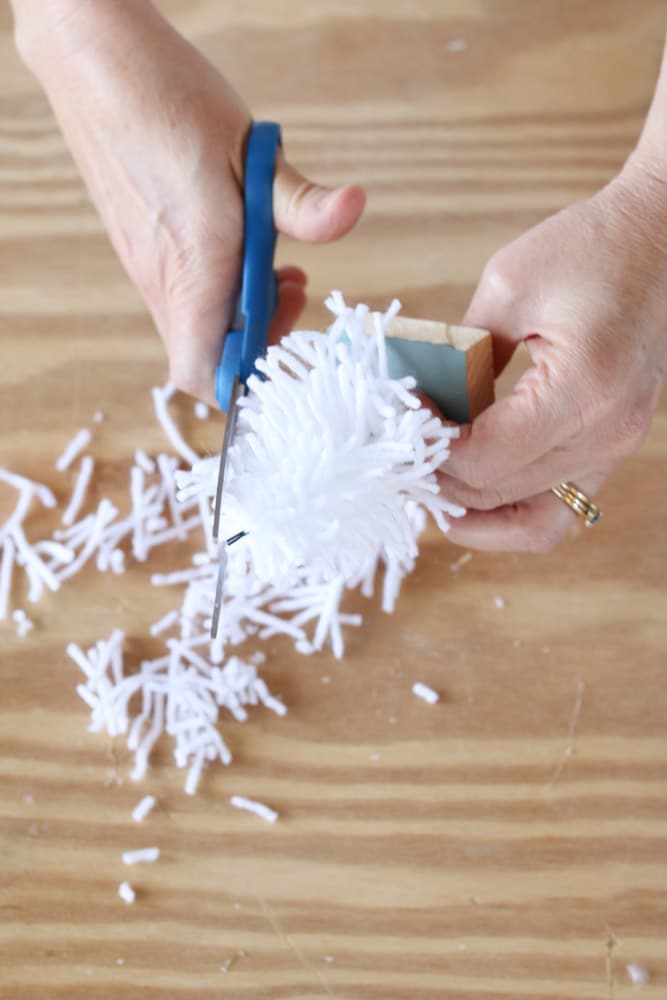
Next, turn the tree over and start trimming at an angle pointing towards the floral wire at the top making the shape of a Christmas tree.
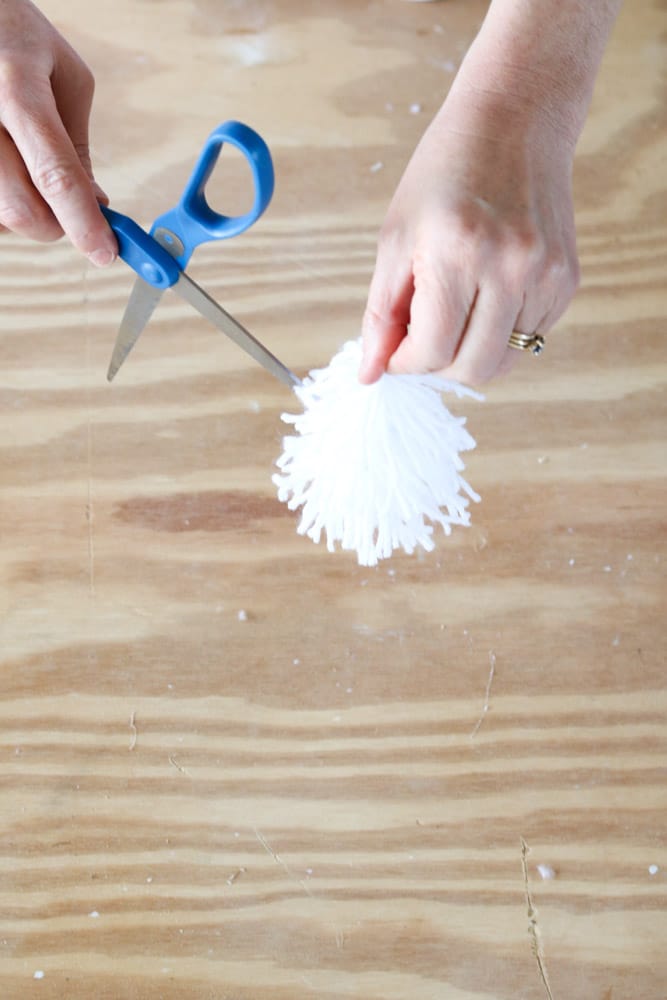
You can make them more tailored simply by grabbing your scissors and use the end to smooth out the yarn branches as you shape and spray.
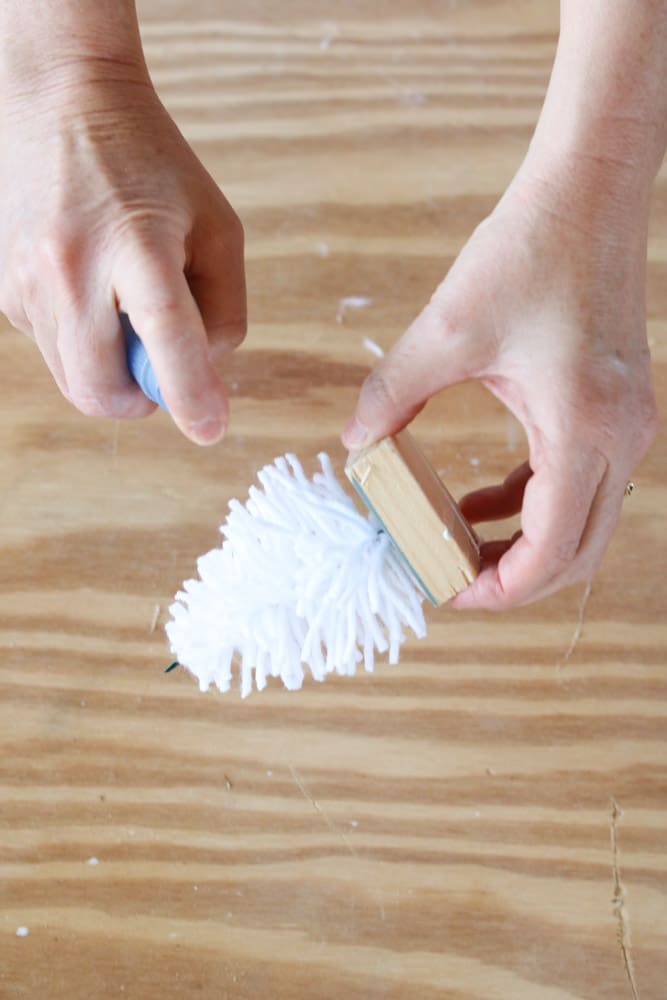
Spray more hairspray if you feel it needs more to hold its shape and turn it upside down again to make the yarn stand out.
Isn't this fun! I love making things with yarn like this how to make a pom pom garland I shared recently.
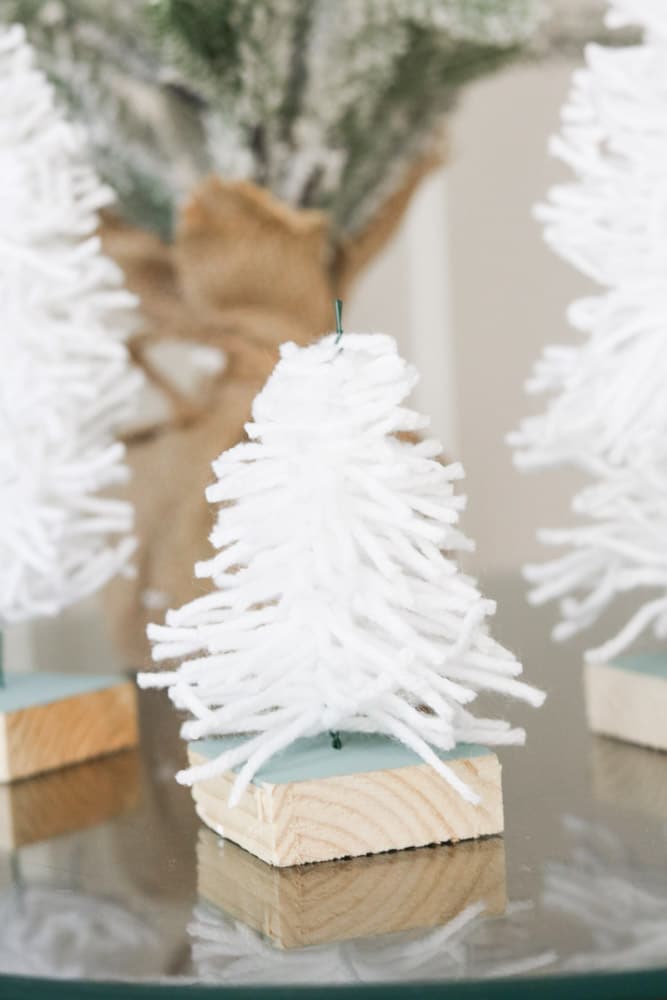
You can make all kinds of sizes and heights. Trim your tree to be fluffy and short like this one.
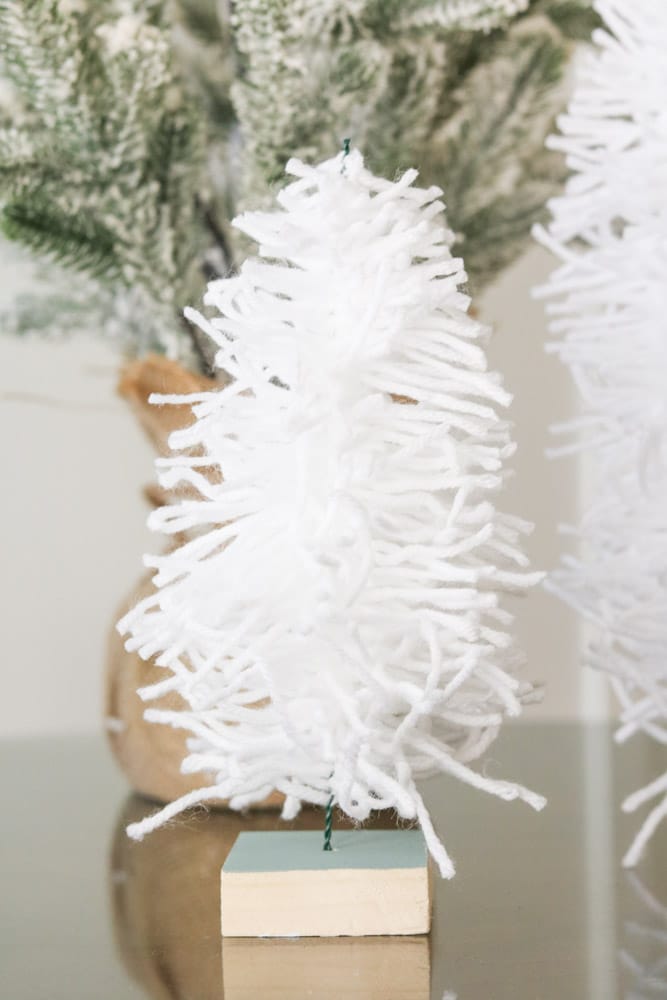
Or whimsical like this one. I didn't comb out the branches with the scissors when I was making this one. I basically turned it upside, shook it, and sprayed it at the same time.
And guess what? You are done!!!
Now that you know how to make these yarn trees you can easily make this yarn winter hat Santa garland. It is another easy and fun DIY!
Conclusion
Now that you have one tree finished continuing to make more trees. Here are some ideas on how to style your mini bottle brush trees as a part of your holiday decorations.
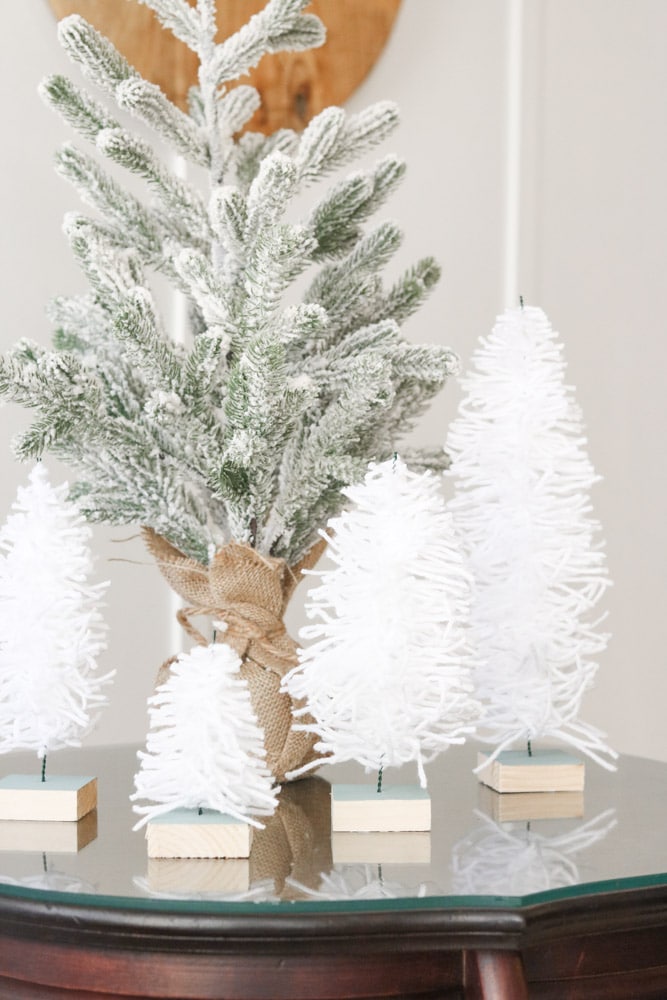
You can make a mini Christmas tree forest along with a larger Christmas tree on a table.
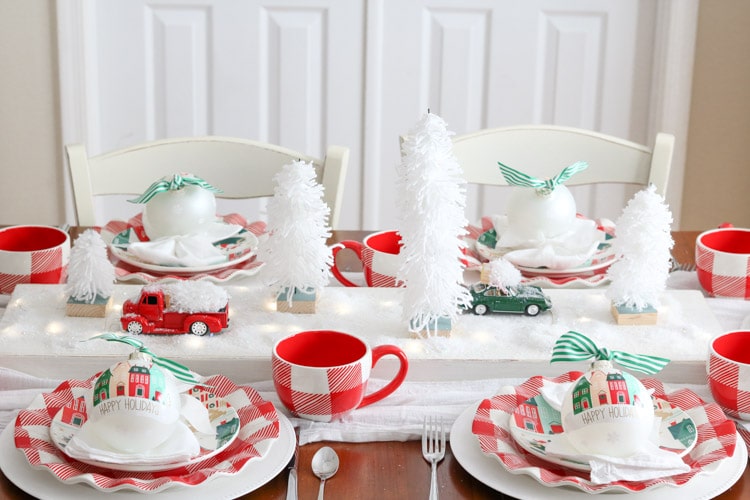
Another fun idea is using your tiny yarn trees as a Christmas tree centerpiece on your Christmas dinner table.

And last include them on your Christmas mantle. Simply place these tiny yarn bottle brush trees along with your beautiful holiday decorations on your mantle. And now you will have your own bottle brush trees for years to come. You could add some fake snow at the base of the trees to add a little definition. I share how to create a Christmas mantel along with other amazing Christmas mantel ideas.
I hope you have as much fun making these lovely little trees as we did and I would love to hear about your precious little bottle brush tree decorations when you are finished. I hope these cute little bottlebrush trees bring you lots of joy this holiday season!
Happy Decorating!


If you enjoyed this post, sign up to receive new decor ideas each week. FREE EMAIL SUBSCRIPTION
HOW TO MAKE A LITTLE YARN BOTTLE BRUSH TREE

Mini bottle brush tree made with yarn.
Materials
- Yarn
- Floral wire
- Wood
- Wine cork
Instructions
- Begin by cutting two pieces of wire the height you want your tree to be and then lay one piece on a table
- Wrap yarn around your hand 50 times for a 6" tree or more if you want your tree to be higher.
- Cut the side of the yarn with scissors and lay the yarn down on the center of the floral wire.
- Lay the other piece of wire on top of the yarn and attach the locking pliers to the ends.
- Next twist the wire in opposite directions until the tree is twisted as much as you like then remove the pliers.
- Take a piece of wood and nail a hole in the middle the same size as the end of the twisted wire or cut a piece of cork.
- Now slide the bottle of the tree wire into the hole or twist it down into a cork.
- Next, turn the tree upside down and shake and spray with hairspray then start trimming your tree to form it into a Christmas tree.
- Last style your tiny tree into your Christmas decorations.
Notes
Recommended Products
As an Amazon Associate and member of other affiliate programs, I earn from qualifying purchases.



CHRISTMAS TIERED TRAY DECOR IDEAS FOR A JOLLY HOLIDAY
Monday 21st of December 2020
[…] you love crafting your own tiered tray accessories try my DIY bottle brush trees or how to make a pom pom […]
HOW TO MAKE A YARN WINTER HAT SANTA GARLAND
Saturday 19th of December 2020
[…] Santa's beard is basically the step on how to make an easy bottle brush tree DIY. […]
FARMHOUSE STYLE BUFFALO CHECK CHRISTMAS DECOR IDEAS
Friday 18th of December 2020
[…] just say it coordinated with the vintage village ornaments that guests got to take home and my how to make bottle brush trees post happen to take center stage on the […]
HOW TO CREATE A MAGICAL CHRISTMAS TREE CENTERPIECE
Saturday 12th of December 2020
[…] year we fell in love with these DIY bottle brush trees made of yarn. The Christmas decorating possibilities are endless but when we created this Christmas […]
CHRISTMAS MANTEL IDEAS FROM FARMHOUSE TO RUSTIC
Sunday 6th of December 2020
[…] Using mirrors and things from the past this nostalgic Christmas mantel design includes mirrors and old saint nick. But the icing on the cake was adding these yarn DIY bottle brush trees. […]