

After spending a week researching and looking for just the right storage containers to organize my fridge here is my best advice on how to organize your side by side refrigerator. We will talk about what to place where and why. And how to make it all look pretty.

After a week of research and looking for just the right containers I wanted to save you time and share with you how to organize a side by side refrigerator.
Have you ever admired those refrigerators that look so organized and pretty? The ones with all the matching storage containers and the liquids in pretty bottles.
I am drawn to anything organizing so when I learned that my new fridge was not coming in for another 6 months I decided to give my older Kenmore side by side some attention.
This post contains affiliate links, meaning I receive a commission if you purchase using the links below at no extra cost to you. All opinions are all my own.
How to Organize a Side by Side Refrigerator
To begin here is a step-by-step list of fridge cleaning and organizing and a shopping list of supplies.
- The first step is to remove everything from one shelf at a time (trash anything that has passed its expiration date)
- Clean each shelf, drawer, and fridge body on the interior using Dawn dishwashing liquid, a soft sponge, magic eraser, paper towels, or lint-free dishtowels
- Place new containers and items into your fridge and organize them into categories like produce, meat, leftovers, and so on.
- Transfer foods to jars, bottles, and bins (Here are the ones I used, glass jars with snap lids, long narrow acrylic boxes, egg drawer, white ceramic butter dish, glass liquid jugs, a basket, a small basket for a drawer, produce to a crisper container for fruit, a large container with sealed lid for vegetables)
- Label containers and drawers with label maker
Shop Supplies to Organize your Fridge
Now that we have an action plan and supplies, let's break this down. I will show you each step of the way and explain why we did things the way we did.
Remove Foods from Fridge
Begin by removing every item from inside your fridge working from the top down. Look at expiration dates and toss food if it has expired.
The best practice is to work one shelf at a time so only remove items on the top shelf first and then move to the next shelf after cleaning and replacing the top shelf.
Next, any food that needs to stay refrigerated place them in a second fridge if you have one. We have an extra one in our garage but you may have a mini-fridge somewhere. If you don't have a second fridge, leave the perishable items that can spoil in the back on another shelf for now.
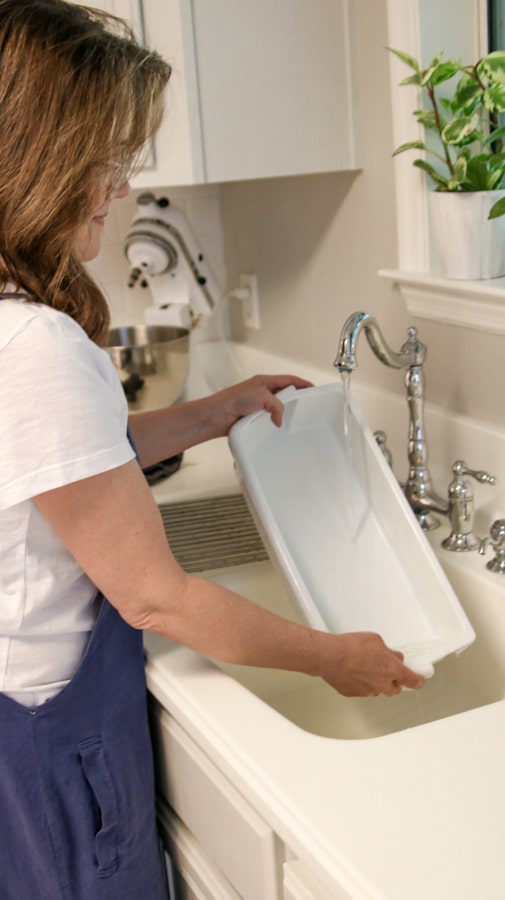
Once you have pulled everything off of the top shelf, remove the shelf for washing. Remember, we will be working one shelf at a time.
Best Way to Clean a Side by Side Refrigerator Interior
I like to use Dawn dishwashing liquid, a soft sponge, and hot water. Give each shelf and drawer a good bath and dry them with paper towels or lint-free dishtowels.

Next, take your sponge and wipe down the interior of the refrigerator body. Again, start at the top and work your way down. That way any debris will fall to the bottom and you can collect it at the end.
If you see any areas that need a little more than a sponge try a magic eraser. I have some scuff marks on the edge of one of my drawers. A magic eraser got rid of it easily.
Test a small area first to make sure it doesn't harm the finish.
Now collect all the new containers and give them a good warm water bath too. Dry them with paper towels or dish towels and set them aside to use when organizing each shelf.
Side by Side Refrigerator Organization
As you work your way down cleaning all the shelves, think through how to organize your fridge by zones. I shared how to organize your kitchen by zones and we are going to do the fridge the same way.
For example, all produce will go into the produce drawer and the berry basket will be set above it on the shelf. I will show you more as we go through the fridge.
Also, consider placing your new storage containers in the fridge as you work without filling them. That way you can return it if you don't use it.
Storing Meat in the Meat Drawer
Make sure to always keep the meat in this drawer because it is designed to keep it at the right temperature so they don't spoil. Items we store in this drawer are lunch meats, raw meat while it is thawing out, bacon, breakfast sausage, and more.
We only keep the meat in this drawer. Make sure to place the meat in ziplock bags or containers with a sealed lid.
Organizing Produce
Next up from the bottom of my fridge is the produce drawer. Some refrigerators have a produce drawer with two climate options. One is for high humidity and the other setting is for low humidity.
Here is a post on how to use the crisper drawer and it tells you what fruit and vegetables need high and low humidity. If your fridge has two crisper drawers, you can have one set for high humidity and the other for low humidity.
If you are like me, you probably only have one crisper drawer in your side-by-side fridge. I set my crisper drawer to high humidity and place items that need high humidity inside.

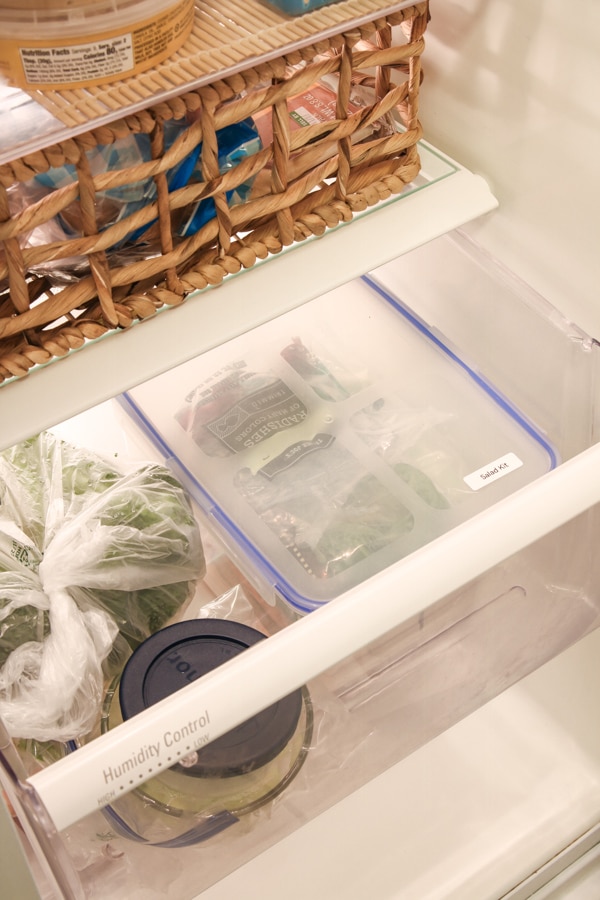
For my salad items like spinach, carrots, cucumbers, celery, and such, I placed them in a sealed container. I eat a salad every day for lunch so it is super easy to grab the container and make my salad. And I have found that my salad foods last longer in a sealed container.
For my berries, I use this acrylic container with a basket inside. This container has a venting option on the top. If you place berries inside make sure to open the vent so moisture is allowed to flow out.


One tip for determining if you need to open a vent or not is to think about how the produce arrives from the grocery store. For example, all berries come with vented holes on the bottom and sometimes a white absorbent piece of material in the bottom.
Copy their lead and store your fruit and vegetables the same way in your fridge.
Now I set my berry container on the shelf above my produce drawer and not inside the high humidity drawer. This helps it to stay fresh longer. Plus it makes getting berries for a snack easier.
One last thought. Do not clean your berries before storing them. They will last longer if you wait to clean them when you are ready to eat them. Unless you plan to eat them all in a day or two. Then it is fine to clean them.
Organizing Bread in Your Fridge
Some of you might be wondering why we have a dedicated space for bread. Well, years ago we changed the way we eat. We eat fresh foods with fresh ingredients now and steer clear of boxed foods and processed foods.
Because we eat more fresh, our bread goes bad fast because they do not have added preservatives. So we have found that bread lasts longer in the fridge and freezer.
So to make this easy and beautiful we decided to place all our bread in a basket on the bottom shelf. Doesn't this look pretty!

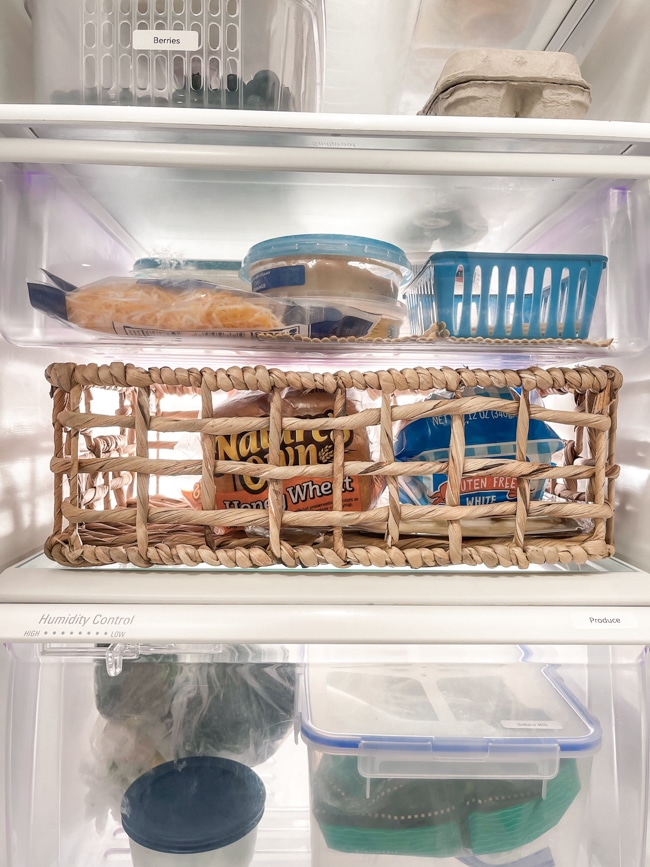
You will be surprised at all the things you can put in your breadbasket. When my daughter brings home donuts they fit in nicely. My daughter also loves pita bread so that goes in there too. And of course, my gluten and dairy-free bread fit too.
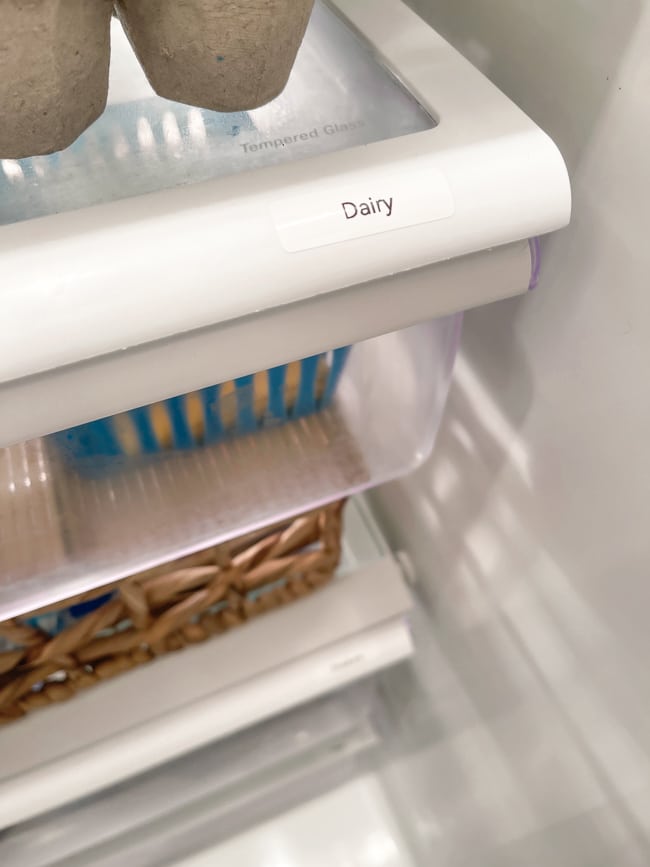
Organizing Dairy Drawer
We have a small drawer in the middle of the side-by-side fridge we use for dairy items. In this drawer, we mostly store cheeses. To make it more organized, I placed a small basket I found at Dollar Tree and fill it with sliced cheese.

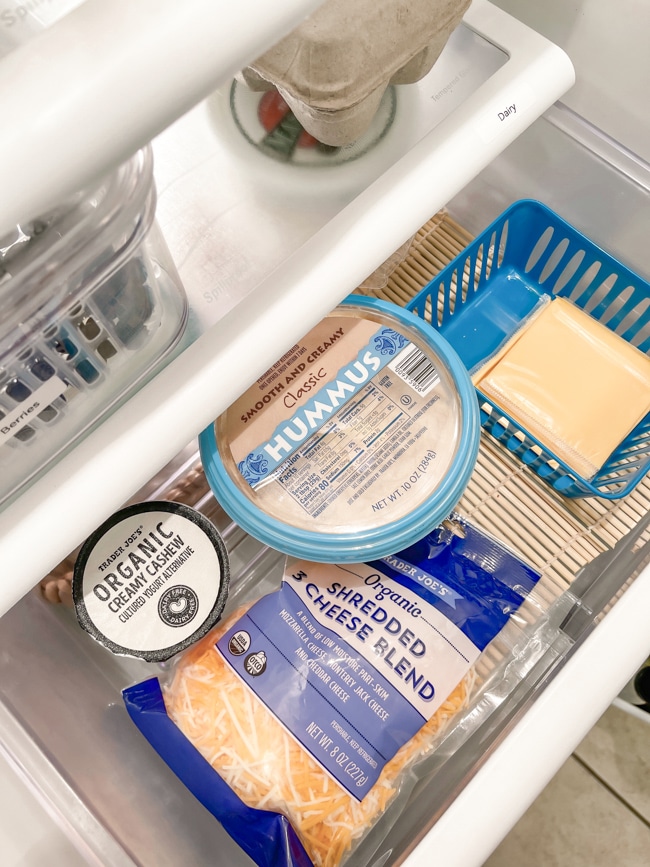
Dollar Tree has loads of storage containers you can use to organize your fridge, especially when you have smaller items. Last year, I organized my sewing supplies with Dollar Tree containers. Talk about making sewing easier. Now I can find everything easily.
Organizing the Middle Shelf
The next shelf is perfect for leftover foods or food items that come and go on a daily basis. We use our middle shelves for all those things.
If you use all the same size containers for leftover foods then this shelf will look nice all the time. Also, use square containers that way they fill in the corners of your fridge. This also looks nice.
Next, if you have adjustable shelves, position your next shelf up a little higher so you can fit a drawer under it. We choose to place the egg drawer on the right side. It is still high enough so we can fit taller things on the shelf below it.


Now if your milk is spoiling quickly, consider placing it in the back of the fridge on this shelf. The coolest place in your fridge is the back of a shelf. The fridge door is the opposite because it doesn't stay as cool but we will talk about organizing the door items soon.
This shelf is also great for containers that store can goods like sodas. We have soda and water bottles but we keep them in the fridge in the garage. Or you can add a clear bin for items like applesauce, Caprisun, and other prepackaged items.
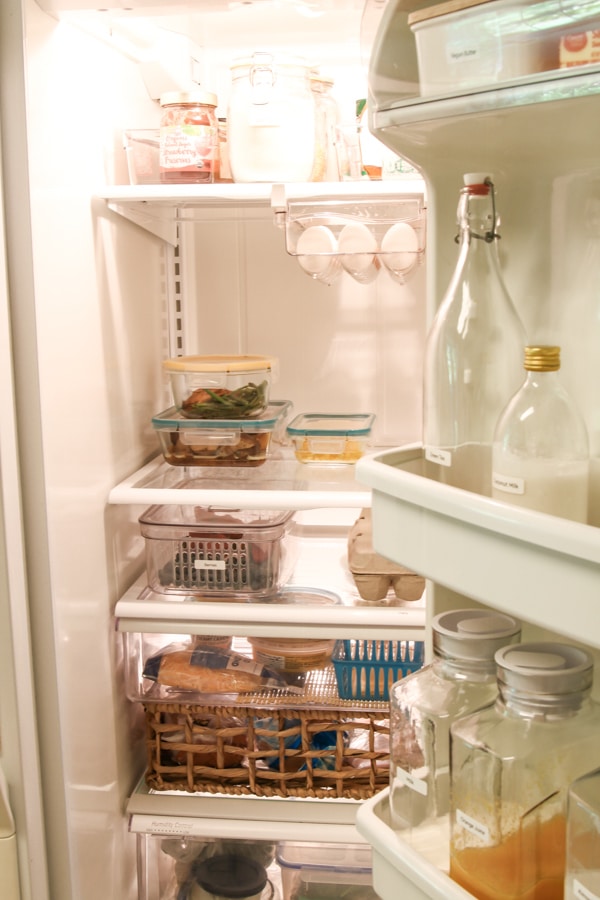
Organizing the Top Shelf
Last on our list of interior shelves to organize is the top shelf. Top shelves are a great place to store any condiments or dry goods. Because of the sustainability of our dry goods, we need to keep many of them in our fridge in airtight containers.
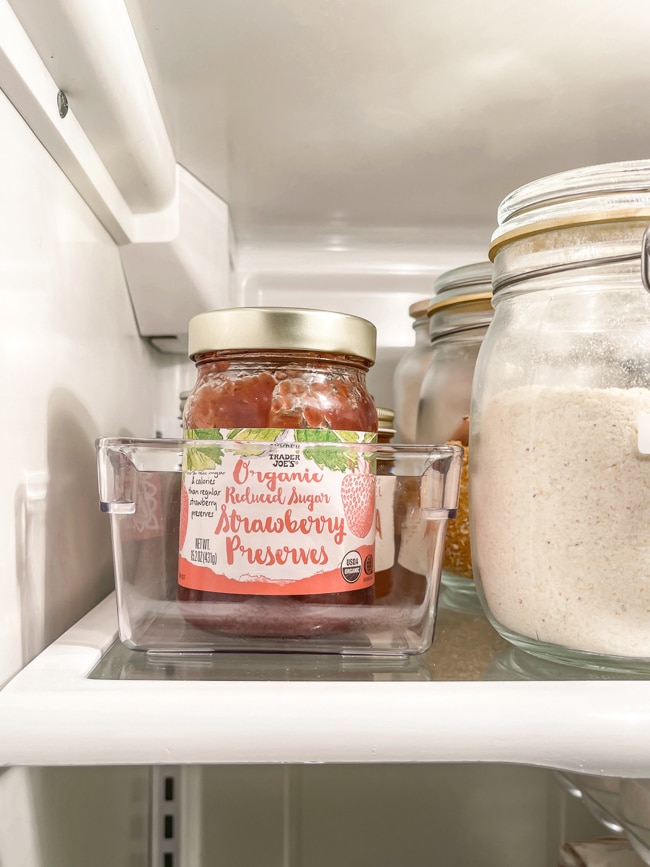
A beautiful way to store dry goods is in glass containers with a snap-down lid. I placed down the middle all my flours and grits containers. These stay fresher longer and keep their nutrient content better if refrigerated.
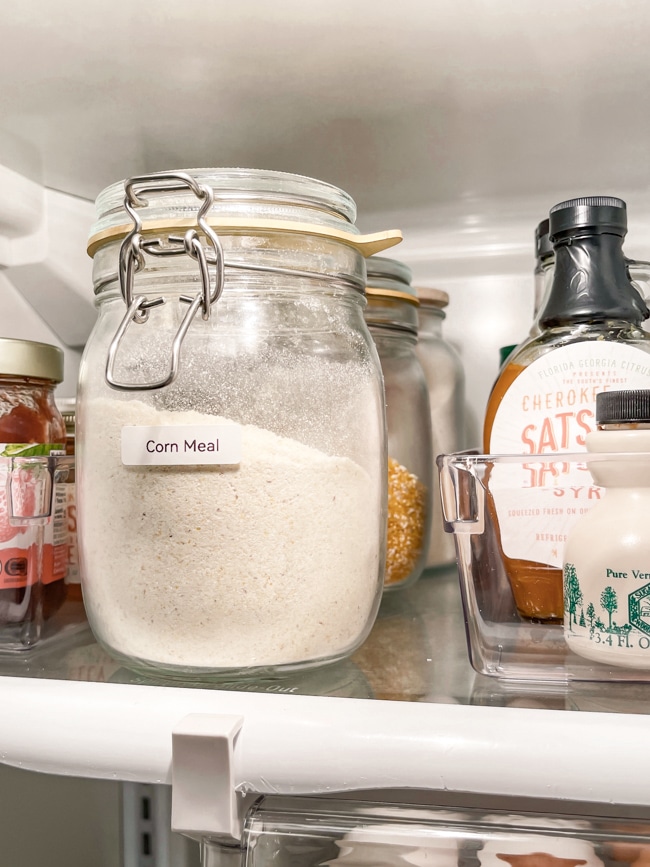

Next to the dry goods are two containers to hold items and condiments that are used most often. We use our syrups and jellies the most so they have a home on the top. If you have two similar items, be sure to put the new item in the back and use the older item first.

Organizing the Doors of a Side by Side Fridge
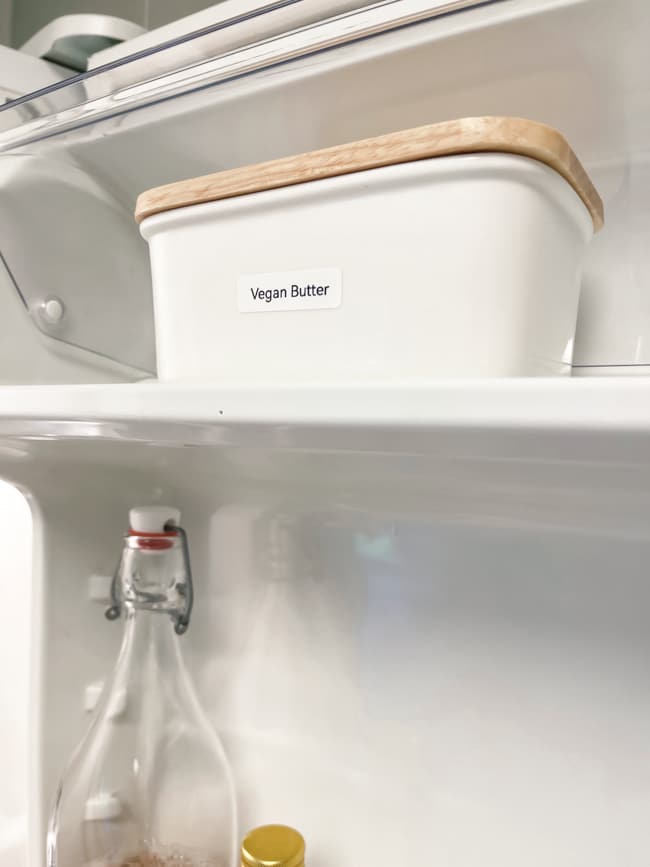
Now let's first talk about the top shelves on the doors. Remember me saying that the best place for milk is on the back of a shelf. Well, the refrigerator door is an easy access place to store butter and drinks but if you are not drinking your milk quickly then place it on the shelf in the back away from the warmest part of the fridge.
We use real butter and leave it out on the counter. If you are wondering if that will spoil and make you sick, I am here to say we have done this for decades and no one has gotten sick yet.
However, we do have a house with ac so if your home is not cool inside then I would research to see if it is safe.
Now remove items on each shelf moving from the top down and clean the shelf. Once the shelf is clean and dry simply replace it and place items on the shelf that are similar or the same.
On the top is our butter. Because I have an allergy to dairy products, I found this butter dish that fits perfectly for my vegan butter.

Next are our drink shelves. After I washed and dried them, I place teas, coconut milk, and other taller items on the top shelf.

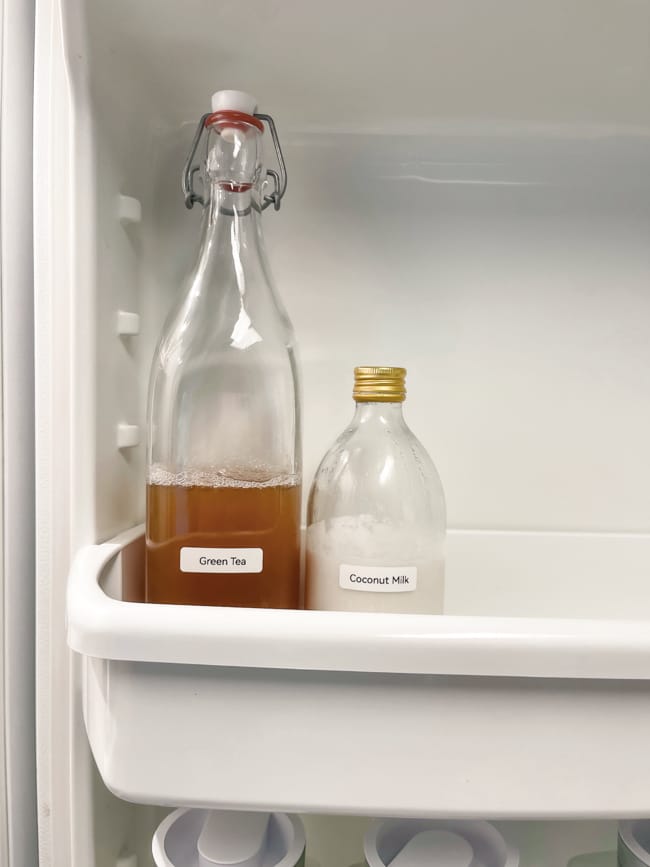
I find my snap top lid glass bottles at TJ Maxx but the smaller jar with the gold lid is actually an apple cyder vinegar jar from Trader Joe's. I loved the shape and the gold lid. The size was perfect for my coconut milk that comes in a can.
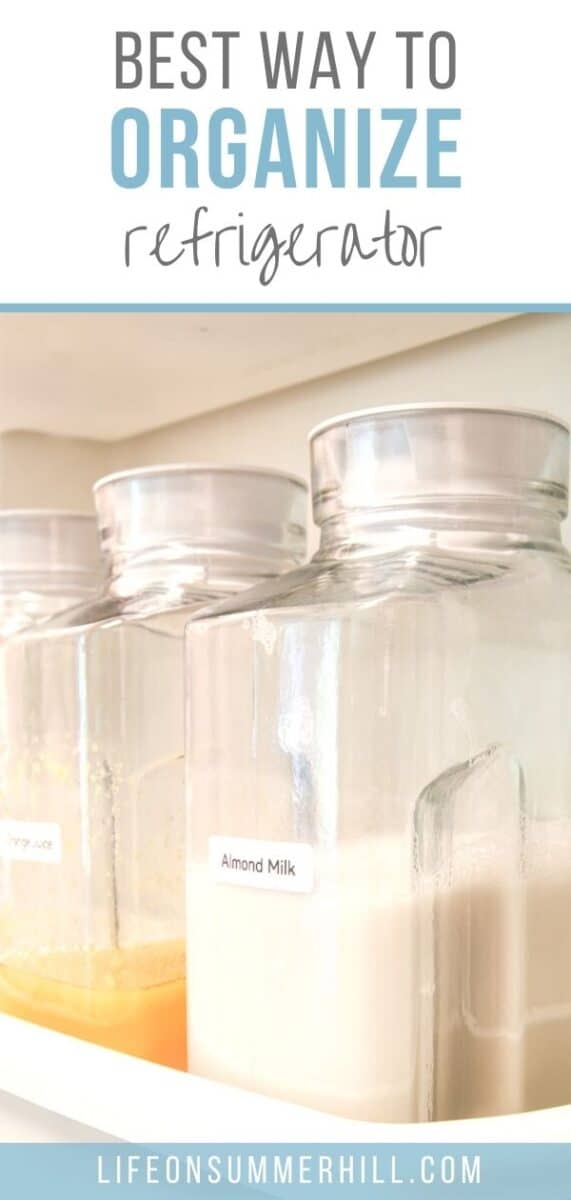
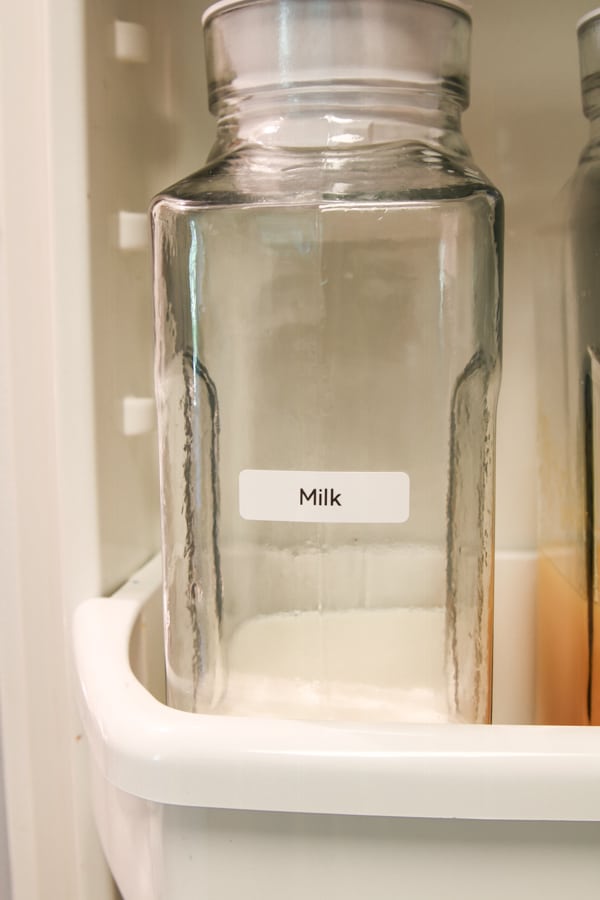
The next shelf is for more drinks. On this shelf, I wanted matching containers for our milk, almond milk, and orange juice.
I transferred all the liquids into the jars that I found at Target. To keep my drinks fresh, I plan to use all the liquid or toss it if it has expired before refilling it with the milk and such.

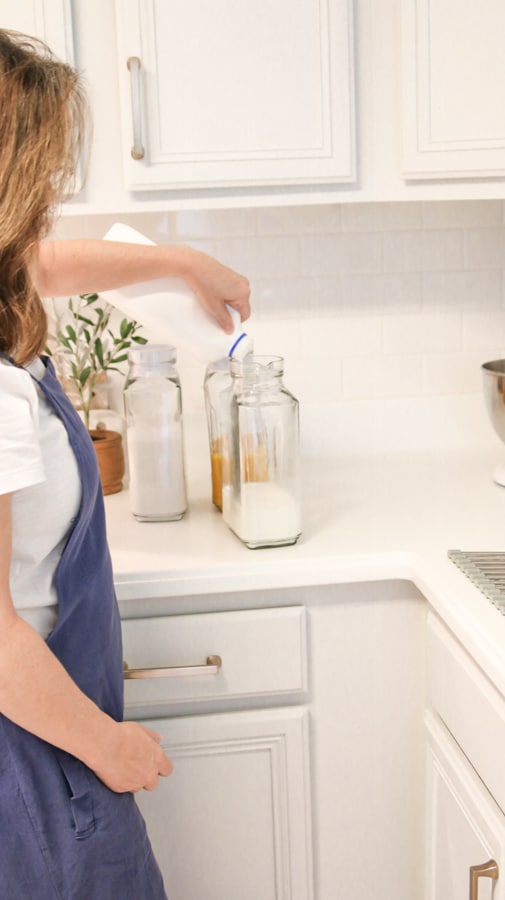
I love the shape and size of the milk container I found at Target. Having all the same size containers make this shelf look so tidy. I also found this similar glass milk container at Amazon. It seems to be a thicker glass and I love the modern cow design on the side.
If you have children, consider a plastic version so it doesn't break if they accidentally drop it.


The next two shelves are a great place for condiments. To save time in the future I decided to keep my condiments in their containers. Let me explain more.
When you come home from the grocery store if you keep your condiments in their containers and simply place them on the shelf then you are saving time. It may not look as pretty and it won't look as pretty on your dining table during dinner but it will save time.
Simply place similar condiments together. I place mayo, ketchup, and mustard kind of condiments on the top shelf of the lower two. This is because we use them the most.
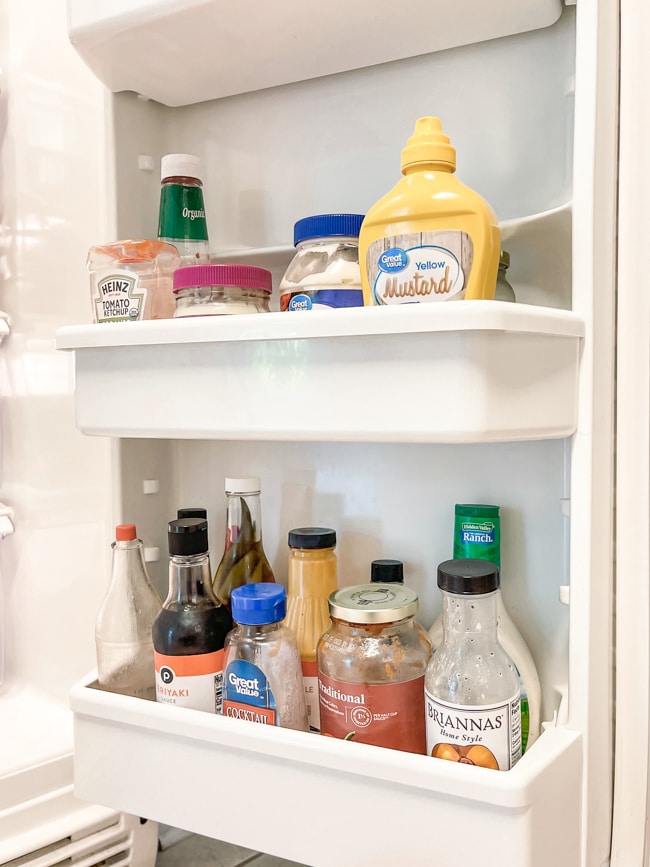

On the bottom are vinegar, soy sauce, pickles, salad dressings, and similar condiments.
Adding Foods to Bins
Can you believe we are finished organizing our side-by-side fridge? Now it is time to place foods into the new bins.
Fill the bottles with milk, juices, and other liquids if you haven't already.

Eggs in the egg drawer.
Shredded cheese, goat cheese, cream cheese, or any other cheese in their containers and place inside of the dairy drawer. Make sure to use your label maker and label them as you go.

Speaking of labeling your food. For the most part, I can see what is inside the container so I don't need to label everything but make sure to label foods that look similar like milk and such.
If you don't want your labels to show you can place them on the bottom. Also, labels will help your family put things in the proper place. So if you have the dairy, produce and meat drawer labeled neatly then they are more likely to place those items in that drawer.
The best way to label your items in your fridge is with this label maker. This is my new favorite contraption. It prints labels with curved edges and you use their app to create the writing.
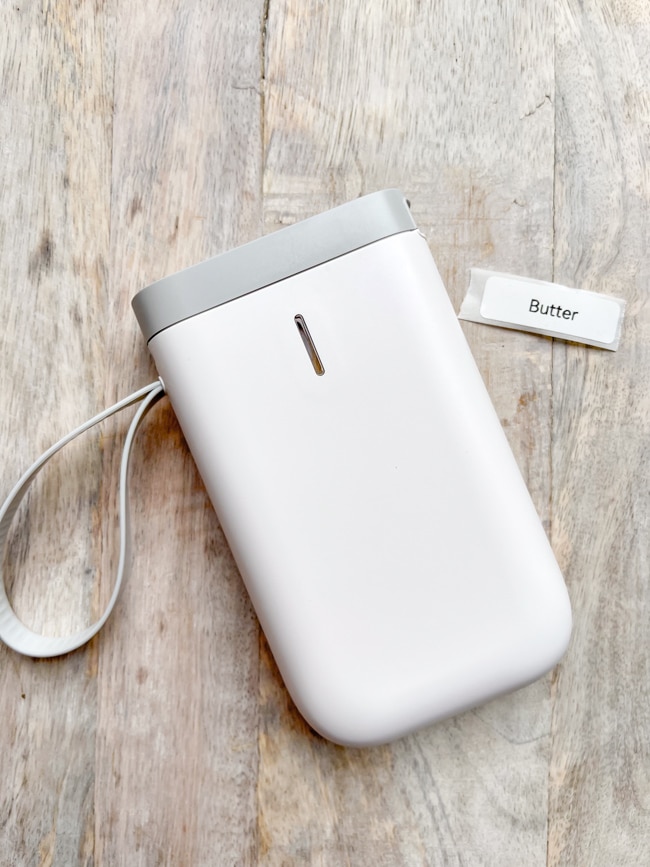

I love that you can change the font, size, and much more with the app. Then once you have it just like you want it, you simply print.
My items have been labeled for over a week now and the lettering hasn't smudged or faded. The labels still stick perfectly. Also, when I labeled one thing wrongly, I found the label easy to remove so I could put another one.
Last, add those condiments you use all the time on the upper shelves in the baskets or you can place your soda can drinks there too.
Final thoughts
Now that our organized refrigerator is finished, here are a few last thoughts to keep your fridge organized and maximize your fridge space.
First, once a week go through leftover foods and toss anything that is old. And place leftovers in smaller, airtight food storage containers.
Do not place a large cooking pan filled with cooked food in it in your fridge. It takes up too much storage space and if it has a tin foil covering it then it will spoil faster anyways.
Convert those leftovers to tightly sealed smaller containers. The only exception to this rule is holidays when you know everyone is going to eat the food again that evening.

Do not overfill your fridge to minimize food waste. A refrigerator that is overfull and things are stacked to the top is not good because you will forget what is in the back of your fridge and it is too much trouble to pull everything out every time you want to look for something.
You will also save money keeping your fridge stocked minimally. Plan your meals for the week and purchase groceries based on that list.
We use our notes app on our iphone as a grocery list. If someone needs something we are all linked and simply place the item on the list. You can also use this handy shopping list we made. Simply download and print it. Leave it on the counter or on the fridge. This will let you spend less time at the grocery store.
And last, consider cleaning and organizing your fridge when it is close to making a grocery shopping trip. When the fridge is more empty is a great time to do this project.
Well, I think that covers all my tips and tricks on organizing a side-by-side fridge. If you need help cleaning your water dispenser I have a post and Youtube video on that too.
I hope this DIY has been helpful and I hope it has inspired you to clean out your fridge and give it good organizing.
Happy Decorating!


How to Organize Side by Side Refrigerator the Best Way
Here is a step-by-step list of fridge cleaning and organizing and a shopping list of supplies.
Materials
- egg drawer
- white ceramic butter dish
- glass liquid jugs
- small basket for a drawer
- crisper container for fruit
- a large container with sealed lid for vegetables
- acrylic container with a basket inside
Tools
Instructions
- Begin by removing every item from inside your fridge working from the top down.
- Look at expiration dates and toss food if it has expired.
- Work one shelf at a time so only remove items on the top shelf first and then move to the next shelf after cleaning and replacing the top shelf.
- Any food that needs to stay refrigerated place them in a second fridge if you have one or leave the perishable items that can spoil in the back on another shelf for now.
- Give each shelf and drawer a good bath with Dawn liquid soap and a soft sponge and dry them with paper towels or lint-free dishtowels.
- Take your sponge and wipe down the interior of the refrigerator body. Start at the top and work your way down. That way any debris will fall to the bottom and you can collect it at the end.
- If you see any areas that need a little more than a sponge try a magic eraser.
- Collect all the new containers and give them a good warm water bath too. Dry them with the paper towels or dishtowel and set them aside to use when organizing each shelf.
- Make sure to always keep the meat in this drawer because it is designed to keep it at the right temperature so they don't spoil.
- If your fridge has two crisper drawers, you can have one set for high humidity and the other for low humidity.
- Keep salad items like spinach, carrots, cucumbers, celery, and such, I placed them in a sealed container.
- For berries, try the acrylic container with basket.
- If you don't often eat bread, try storing it in a basket in your fridge to keep it fresh longer.
- Keep your dairy items stored together in a drawer and use small baskets to keep like items together.
- The middle shelf is perfect for leftover foods or food items that come and go on a daily basis.
- Try using all the same size containers for leftover foods then this shelf will look nice all the time. Also, use square containers that way they fill in the corners of your fridge. This also looks nice.
- If you have adjustable shelves, position your next shelf up a little higher so you can fit a drawer under it. We choose to place the egg drawer on the right side.
- If your milk is spoiling quickly, consider placing it in the back of the fridge on this shelf.
- This shelf is also great for containers that store can goods like sodas.
- Top shelves are a great place to store any condiments or dry goods.
- A beautiful way to store dry goods is in glass containers with a snap-down lid.
- Use containers to hold items and condiments that are used most often.
- The refrigerator door is an easy access place to store butter and drinks.
- Now remove items on each shelf moving from the top down and clean the shelf. Once the shelf is clean and dry simply replace it and place items on the shelf that are similar or the same.
- Having all the same size containers for your liquids make this shelf look so tidy.
- The next two shelves are a great place for condiments.
- Simply place similar condiments together.
- Use a label maker on foods that look similar like milk and such. Labels will help your family put things in the proper place.
Notes
- Once a week go through leftover foods and toss anything that is old. And place leftovers in smaller, airtight food storage containers.
- Do not place a large cooking pan filled with cooked food in it in your fridge. It takes up too much storage space and if it has a tin foil covering it then it will spoil faster anyways.
- Convert those leftovers too tightly sealed smaller containers.
- Do not overfill your fridge to minimize food waste.
- You will also save money keeping your fridge stocked minimally.
- Consider using a notes app on your phone as a grocery list or keep a paper list by the fridge.
- Consider cleaning and organizing your fridge when it is close to making a grocery shopping trip. When the fridge is more empty is a great time to do this project.