
A hidden microwave is easy to achieve in your kitchen with a microwave in pantry strategy. Here is an easy DIY to transform a cupboard into a microwave pantry.
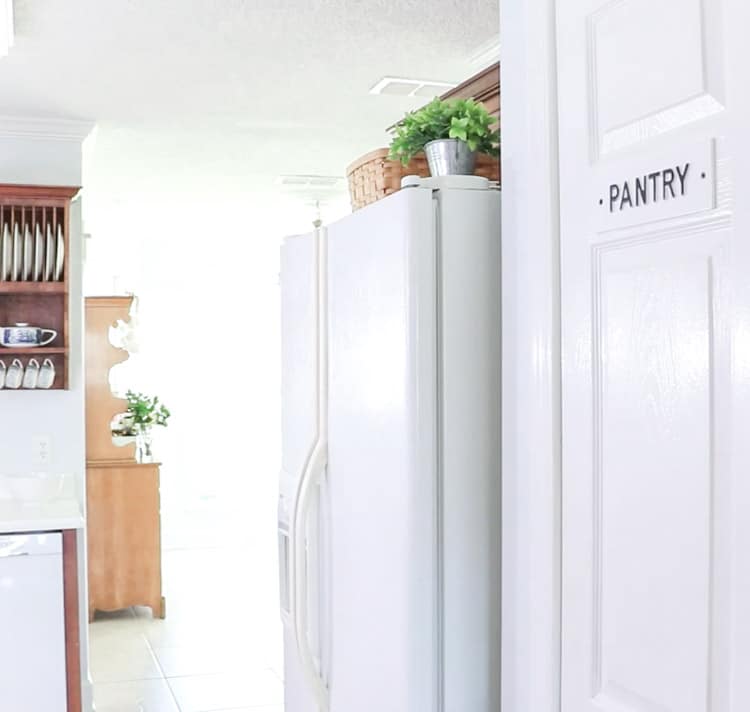

Several months back the microwave over our range died, so after thinking for a while I decided a hidden microwave in pantry might be the ticket to getting a fancier hood for my stove without losing a microwave forever.
This post contains affiliate links, meaning I receive a commission if you purchase using the links below at no extra cost to you. All opinions are all my own.
Microwave in Pantry
This year my goal is to remodel the kitchen. Same cabinets and structure just a whole new face if you know what I mean. Because my kitchen is small but not galley or tiny kitchen small I wanted to focus on some tricks to make it feel larger.
One trick is making the stove the focal point by getting rid of the microwave that is currently over the stove and adding more height. So I was on a quest to find a hidden microwave spot.
Where Can I Hide My Microwave?
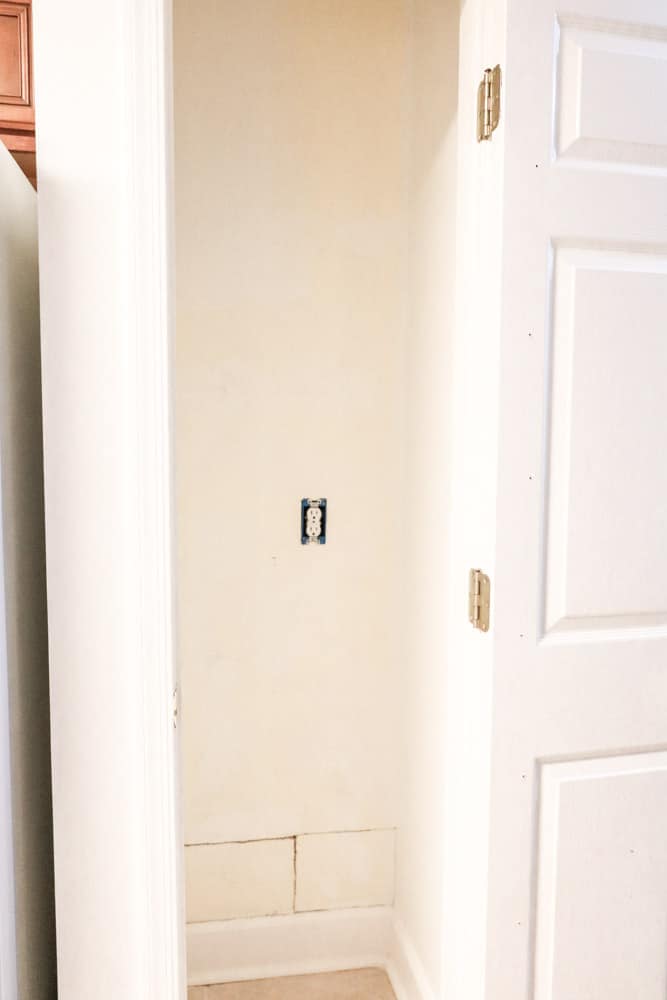
There are a few options for hiding a microwave like in a cabinet, island or pantry and it just happens my small pantry in the kitchen seems to be more a junk pantry than a real storage space.
So the pantry seemed to fulfill my plan but I had one more question.
Can I Put the Microwave in the Pantry?
Now that is a good question because there are a few important things needed. For example, you will need electricity and enough space to fit a microwave.
At this point, I felt certain that a hidden microwave in the pantry would solve my issue and it was possible so now let me share with you the steps on how to create a microwave pantry.
Microwave Pantry
To begin create a plan on what you will do in your pantry microwave space. Here is a list of steps and then we will dive into details.
- Clean out pantry
- Remove shelves
- Measure walls
- Shop for a microwave that will fit dimensions on the plan
- Draw a plan for shelves
- Install electrical outlet
- Clean Walls
- Repair any missing or damaged trim or sheetrock
- Spackle, sand and paint walls
- Install peel and stick wallpaper on the back wall
- Cut shelves to dimensions
- Cut square dowels to dimensions
- Paint shelves and dowels that go on wallpaper wall
- Install dowels and shelves
- Paint dowels installed on painted wall
- Add microwave
- Add dishes
Supplies
Now that you have a microwave in pantry plan it is time to collect supplies.
- Drill and drill bits
- Hammer
- Nail gun
- Smooth wood 1/2″ thick
- Square dowels
- Paint and roller set
- Spackle and putty knife
- Sander and sandpaper
- Measuring tape
- Miter saw
- Peel and Stick wallpaper
- Utility knife
- Electrician for outlet
- Microwave
Shop the Post:


Okay so let's get started!
Clean out Pantry
Begin by clearing out everything inside the pantry. This is a great time to purge by looking at expiration dates and asking yourself if you need the item.
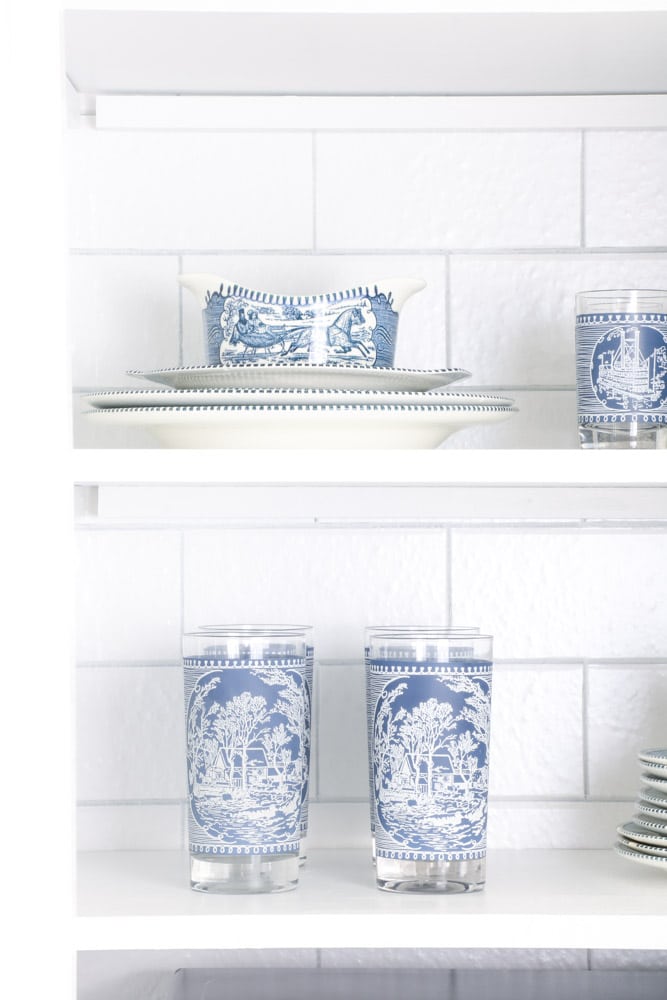
If you find you do not need the pantry for food consider making it a dish pantry. Because we have another pantry I decided this would be the perfect spot for my grandma's Currier and Ives Royal dishes.
Remove Shelves
If you are planning to give your pantry a facelift then go ahead and remove the wire shelves, if you have wire shelves. Things do not sit on the shelves well and I think the microwave will sit on the shelf much better if it is wood.
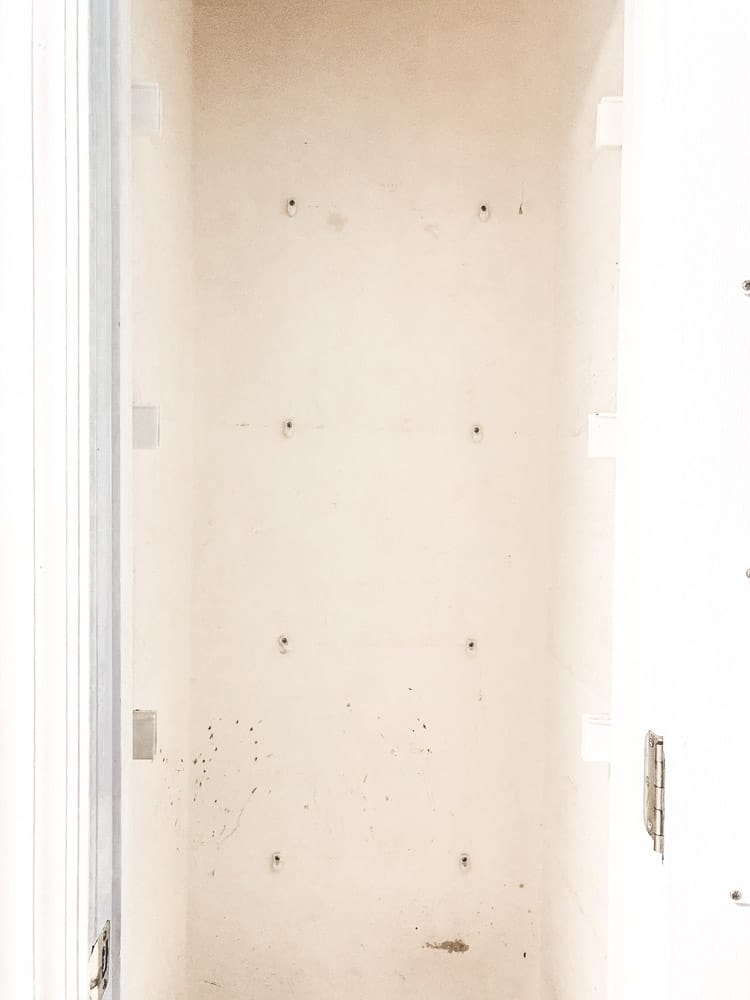

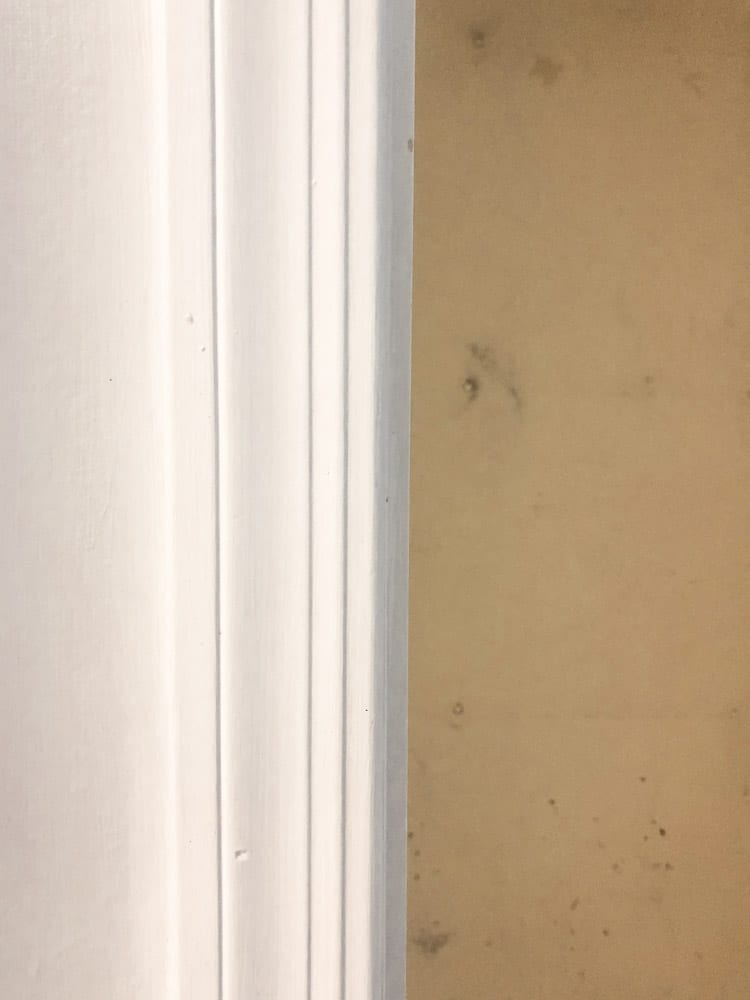
Oh boy! My pantry closet walls were a mess!
Measure Walls
Now let's measure the walls. Measure the width across the back and the height. Then measure the two side walls.
Shop for Microwave
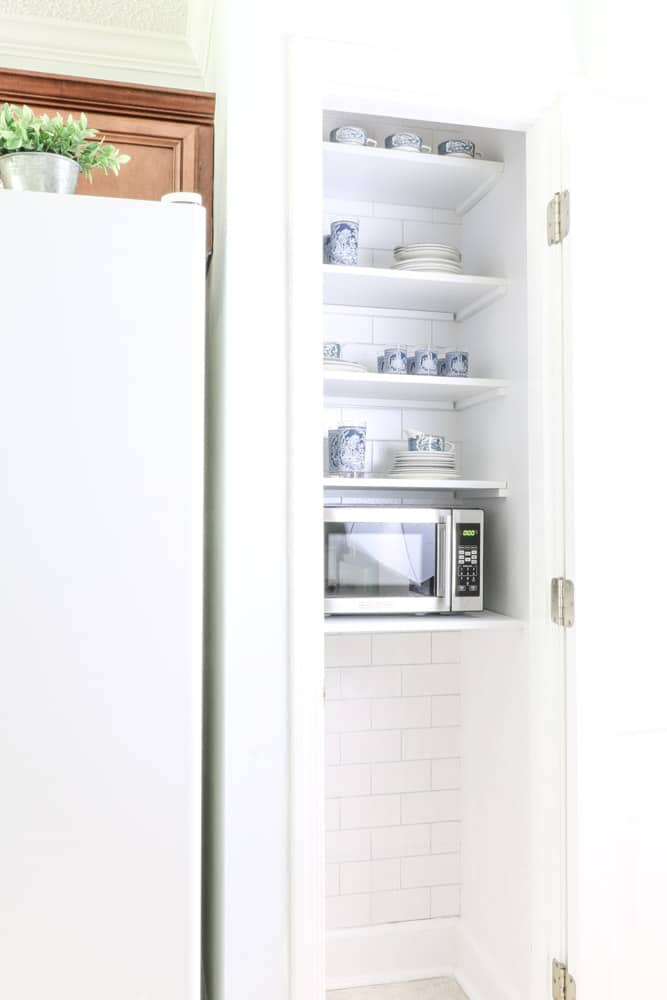
Now that you have the width of the back wall it is time to shop for a microwave. My wall is 23″ but my door opening is 17″ so I needed to factor in how much space I had for the door opening because that may affect opening the microwave.
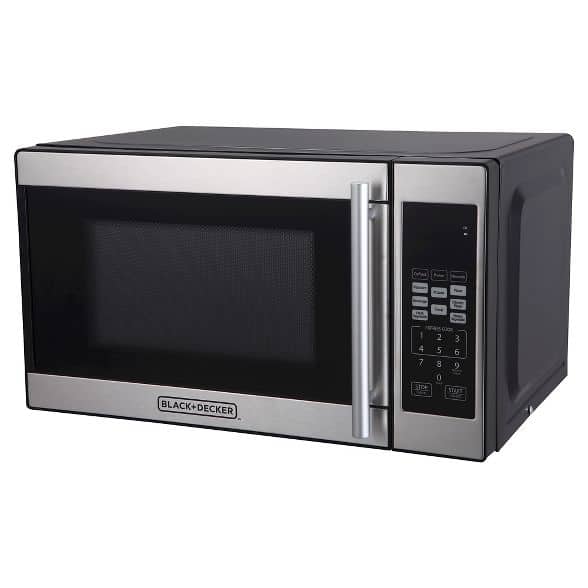

After looking for a microwave that was about 17″ wide I found this Black & Decker model at Target that was perfect.
Draw a Plan
The next step is simply drawing out a plan for where each shelf will sit. At this point, you will need some other information like the size of the microwave and trash can if you plan to store one in your microwave pantry.
You might also want to consider the height of other things you will be stored in the pantry like dishes. Measure the tallest dish you plan to store inside the pantry to make sure your shelves are high enough for every piece.
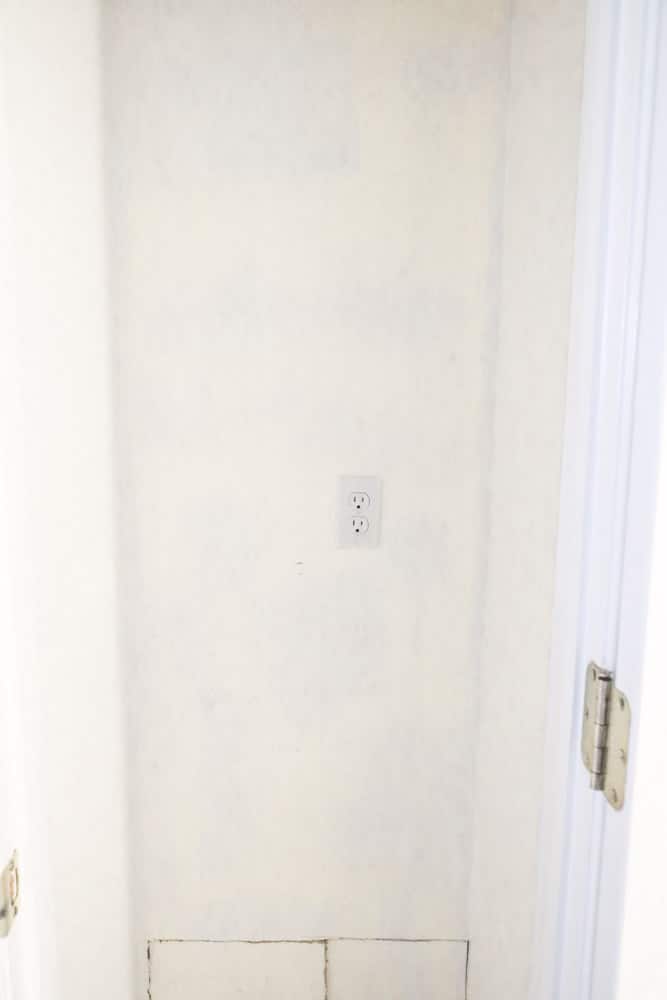
Now make a note of the measurement of each shelf and how high from the floor each shelf will sit. Also, make a mark on the wall where you want the electrical outlet to go.
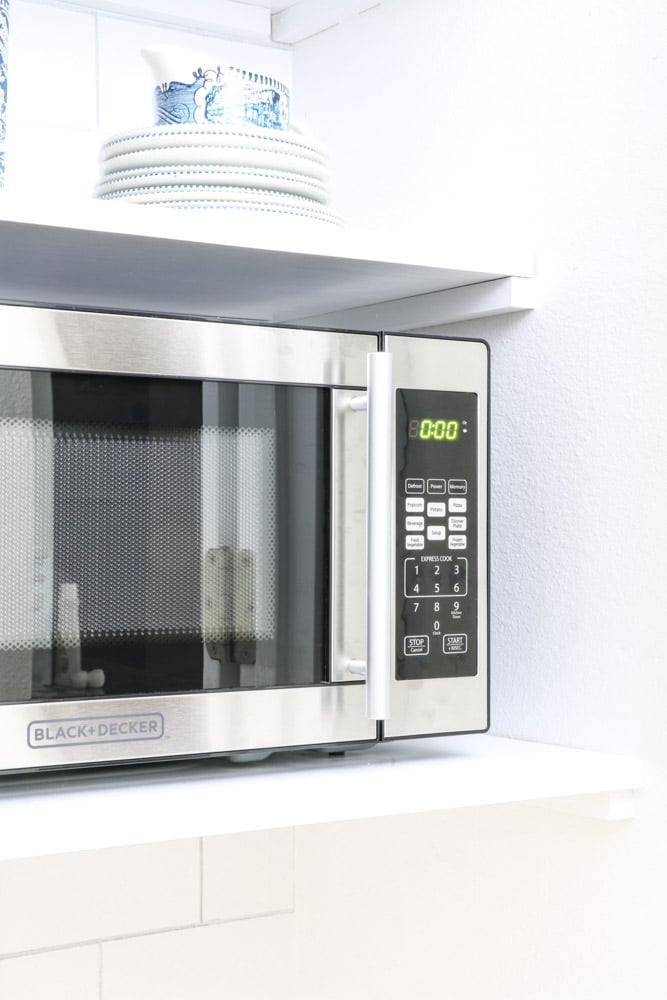
For my microwave shelf, I planned it to be deeper than the other shelves. So I took the microwave depth measurement and added about 6″ for the plug that would go behind it and a few extra inches in the front. The total depth of the microwave shelf is 16″
For the other shelves, I planned them to be 12″ deep which is like the upper kitchen cabinets and they are all 9″ apart. I had planned originally to store my glass pitchers in the space too and that is why I planned on 9″ but when I started installing the Currier and Ives I liked the look so much until I didn't place the pitchers.
Electrical Outlet
Remember you will need an electrical outlet for the microwave in your pantry. I recommend calling a licensed electrician to do this for you. Look back at your drawing or plan and make a mark on the wall at what height you want the outlet.
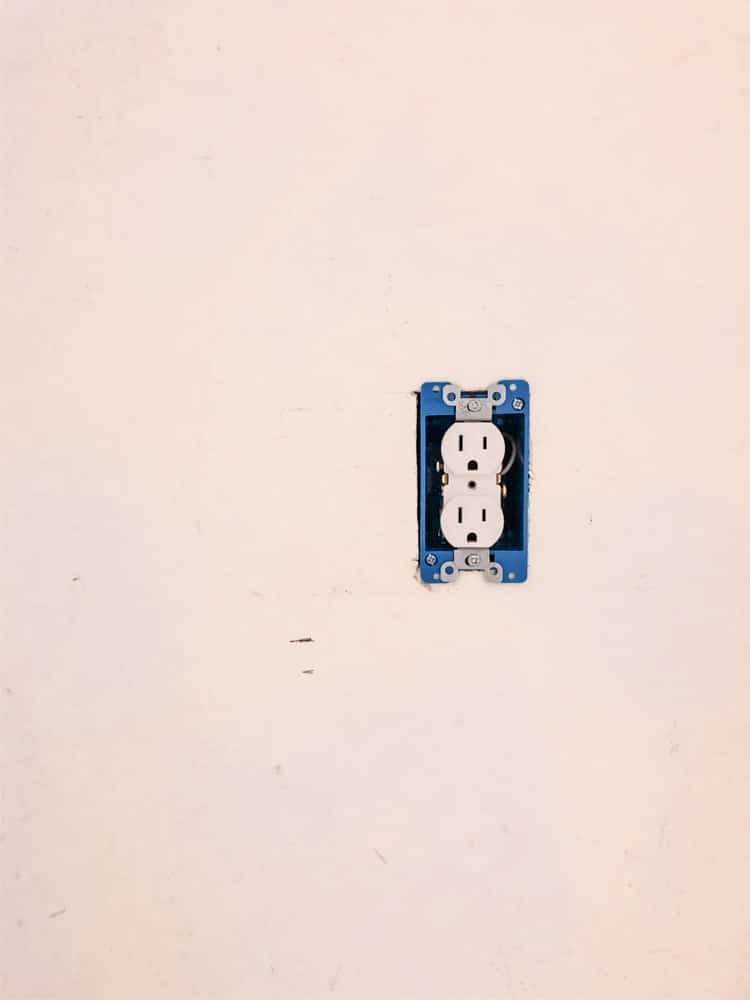

You can put your microwave at any height. Some people have them in an island which makes them low. Others have them over their stove which makes them high. But for our cabinet I wanted it to be about countertop height which is 36″. However, because I want enough space for a nice trash can with lid I made my first shelf at 39″ which is just a little higher than countertop height.

Once you determine where the shelf will go for the microwave then add two or three more inches for the bottom of the outlet. Let the electrician know that you want the outlet above that line.
Repair and Paint Walls and Trim
If your pantry is like mine it will need a little cleaning, repairing and painting. Simply take a rag with some soapy water and wash down the wall, trim and door.
Before you can start painting you will need to patch any holes, fix any trim and spackle where needed. Once you have done this step take your sander and sand the walls of any bumps and such. Especially on the back wall where you will put up the peel and stick wallpaper if you are planning to wallpaper.

Next, start painting with a primer. The primer will block anything that might have gotten on the wall and that will bleed through.

paint the wall whatever color you have planned. If you are considering white my how to paint walls white DIY will give you some good tips. If you are considering another color then check out my painting a room tips.
Peel and Stick Wallpaper
Since you are going to be putting pretty items in your microwave pantry and you will be using it a lot more since you are cooking in there now why not consider hanging some peel and stick wallpaper.
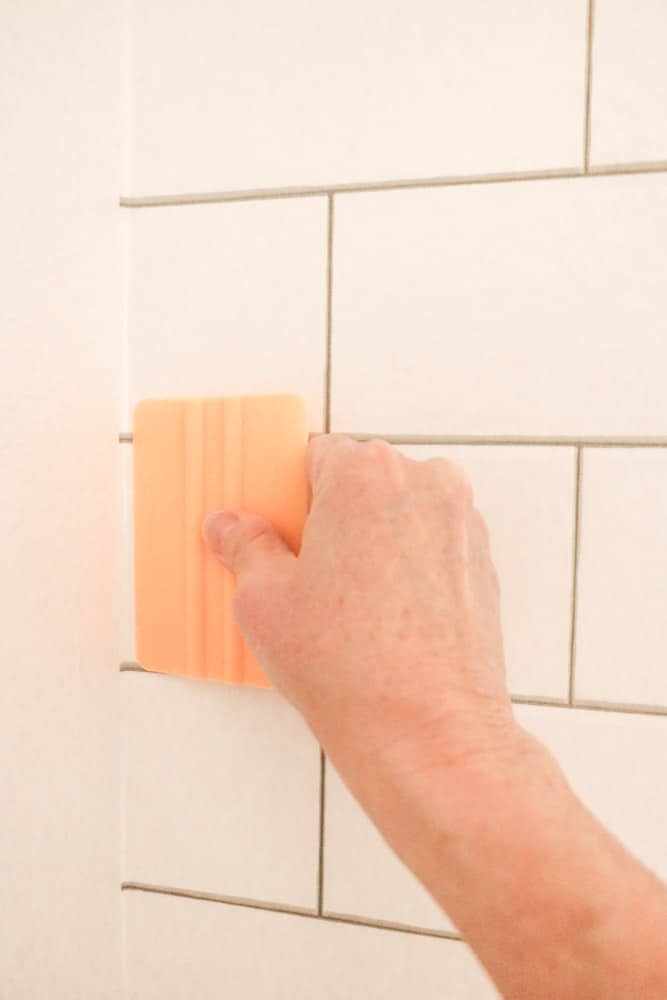

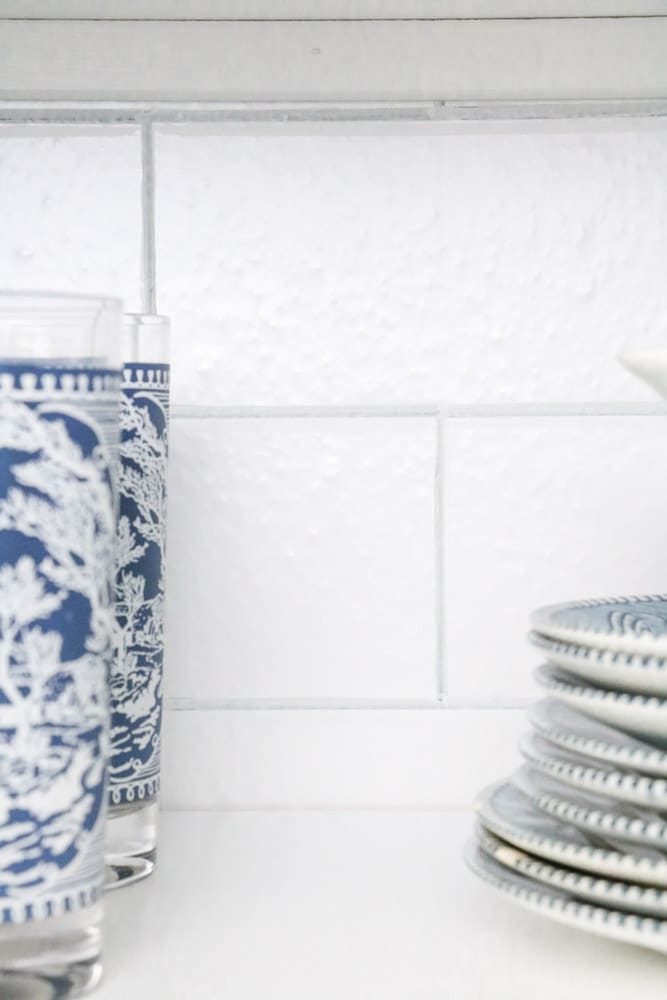
I decided to replicate the subway tile look that is already between my cabinets. But there was one thing that was different and that was the grout line. So I pulled out a chalk paint marker and filled in all the grout lines on the wallpaper.
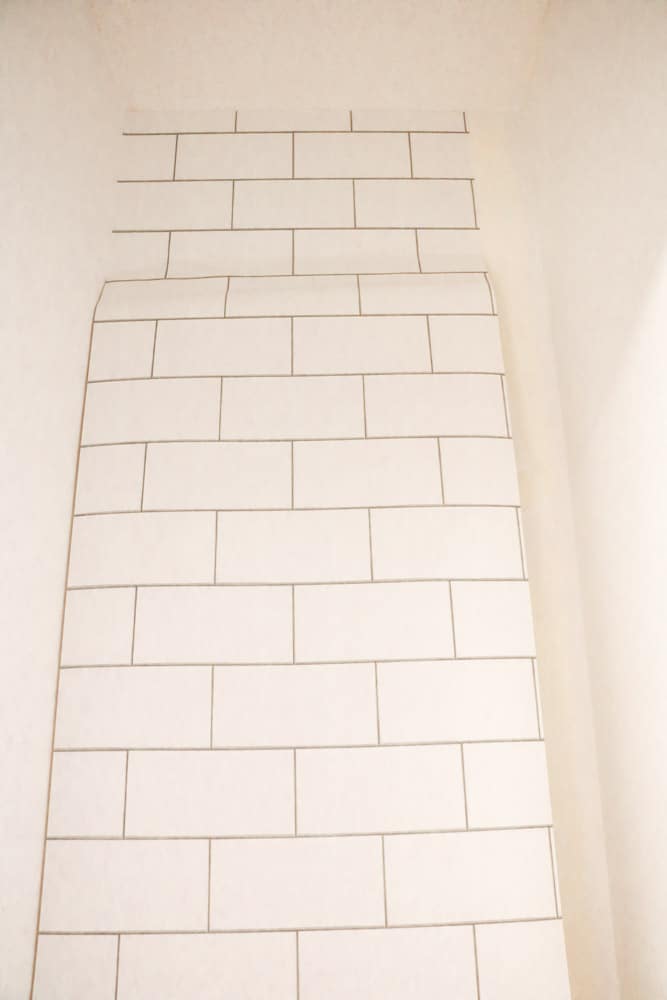

It covered it just enough to give it a shadow effect and match it up closer to my subway tile between my cabinets.
Here are directions on how to install peel and stick wallpaper.
Cut Shelves and Dowels
Now it is time to cut the shelves and the dowels. I started with the microwave shelf. I cut the dowels to my specifications and then the shelf.
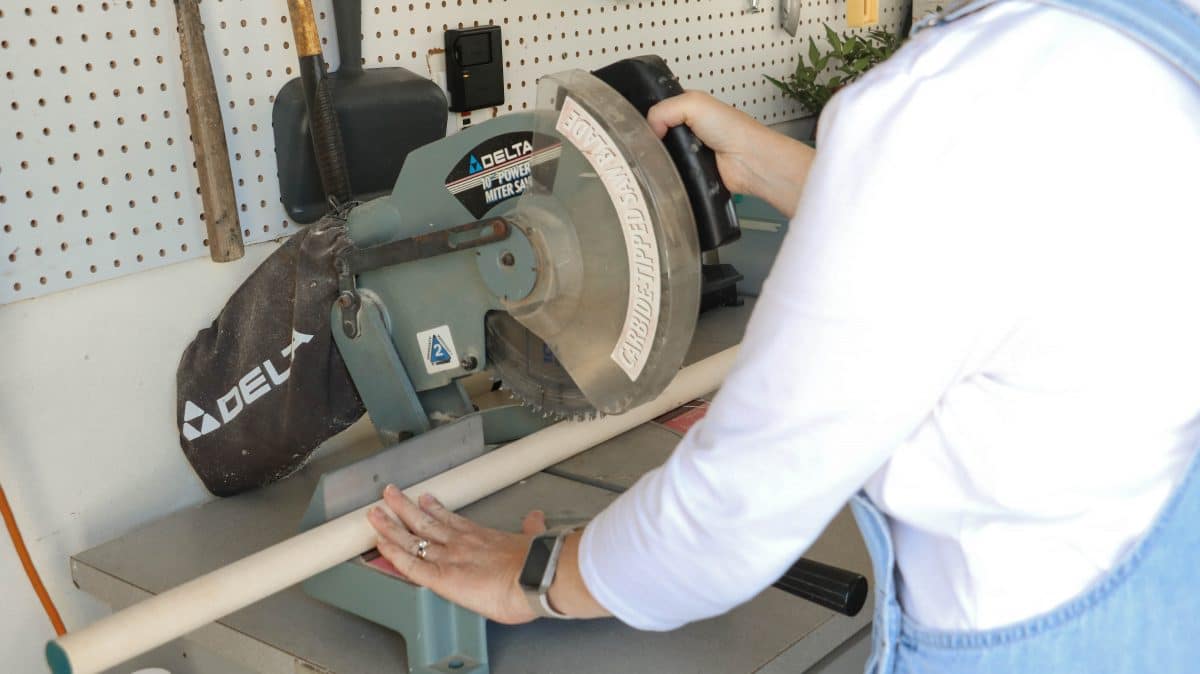

Then I took the shelf into the pantry and made sure it would fit. Next, I cut all the other shelves. The 12″ deep shelves and again made sure they would fit.
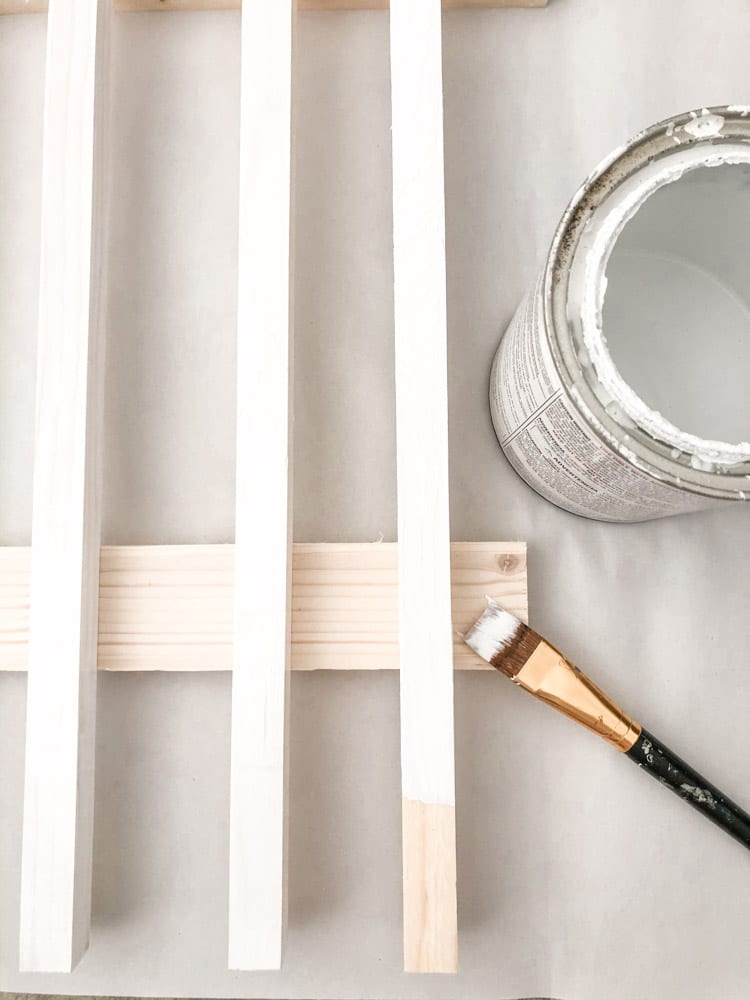
Paint Shelves
This project is really starting to take shape. Layout your shelves on paper with cans of food or wood pieces under them to elevate them off of the paper and prime them first.
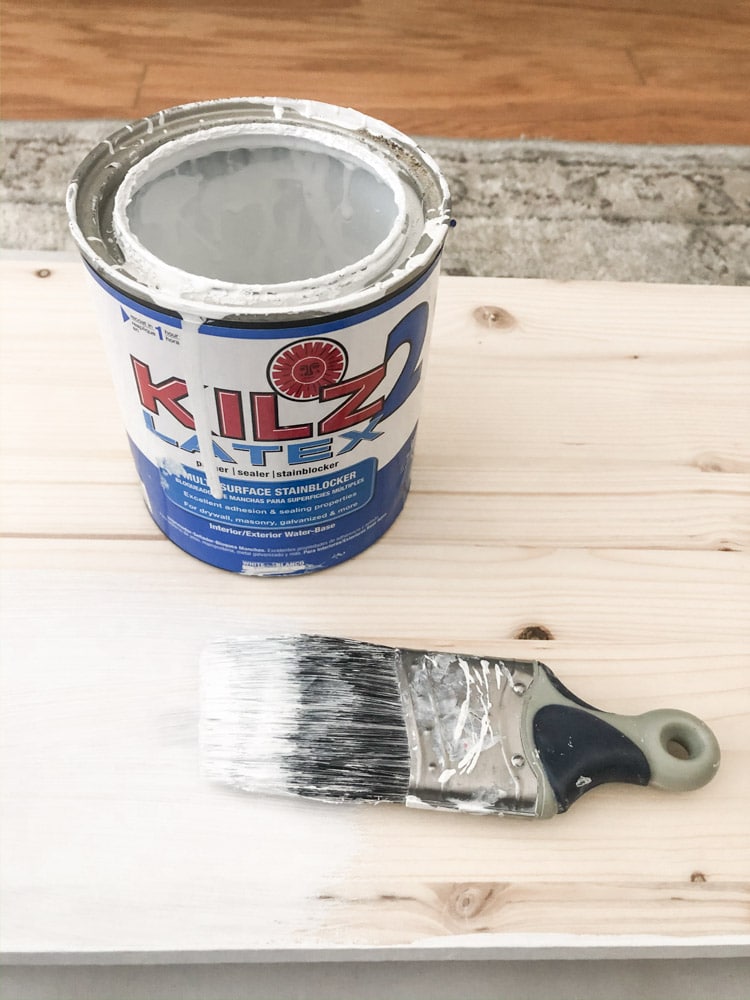

Then add one coat of latex paint. Let the latex paint dry and sand it with a fine-grit sandpaper. Then add another layer of latex paint.

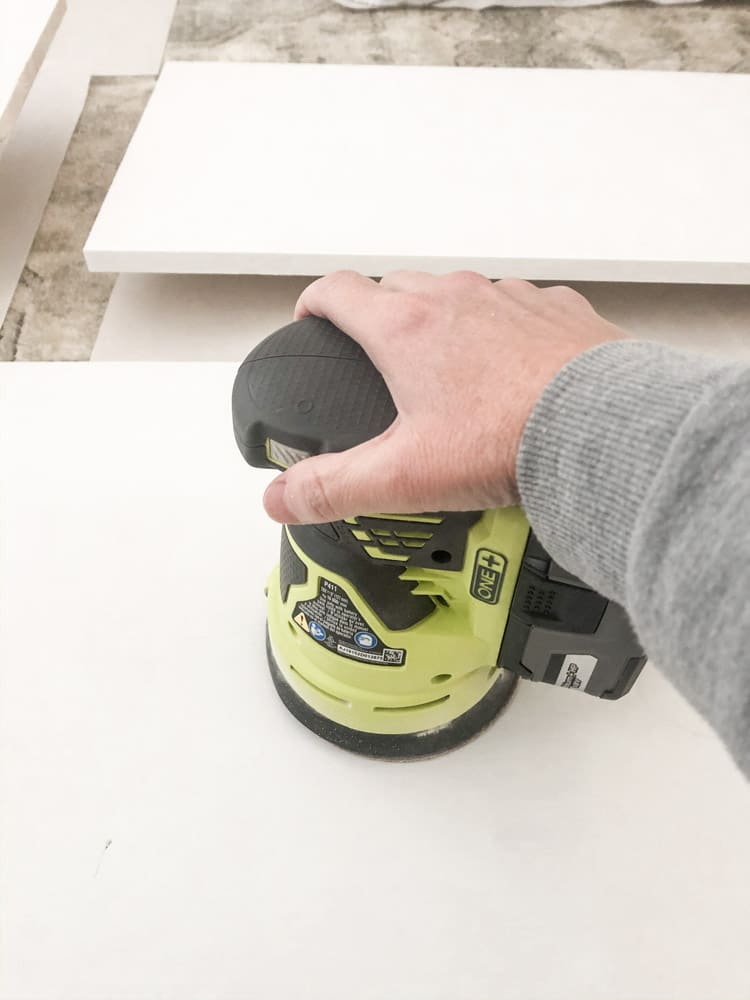
Make sure to paint both sides and the front edge at least. You can do all edges but the front edge is the only thing that will show.
Next paint the dowels that will go on the wallpaper. You can leave one side unpainted since it will go on the wall. Prime and paint two coats just like the shelves.


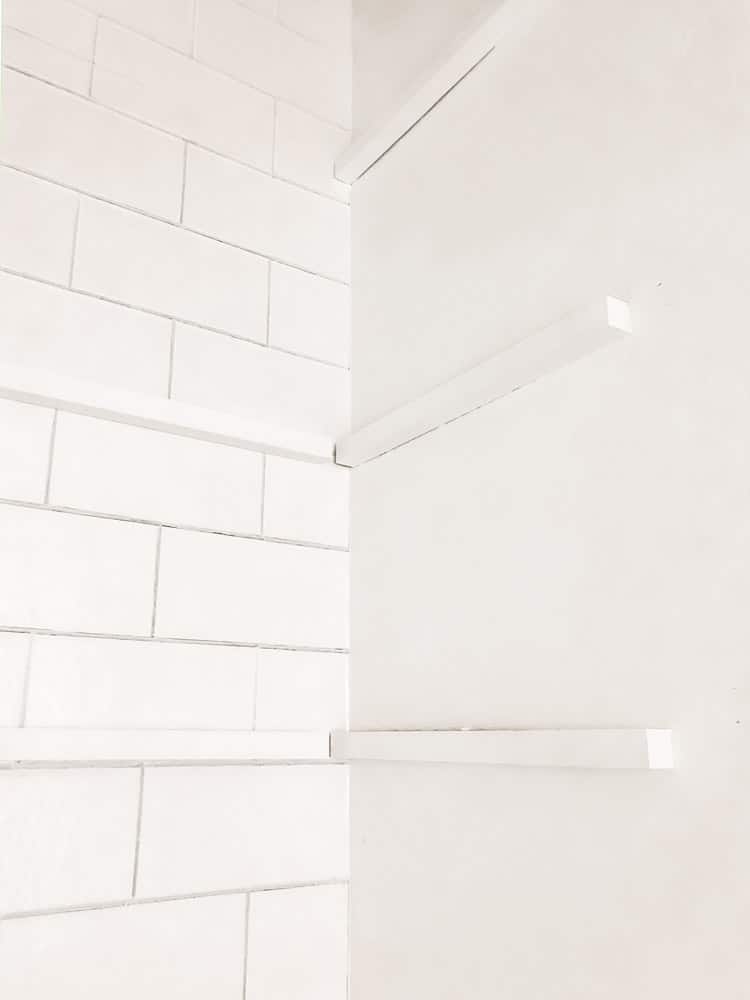
Hang Dowels
Next, take your measuring tape and mark the wall where each dowel will be hanging. Once you have all the makes take a stud finder and mark where there are studs.
Next, lay a small level on your dowel and place your dowel on the mark on the wall. Once it is level use your nail gun to shoot one nail into one end. Once that one nail is in the wall you can move the other end up or down until it is level and shoot in another nail on the other end.
After you nail in the two nails go ahead and shoot in many more nails especially into the studs.
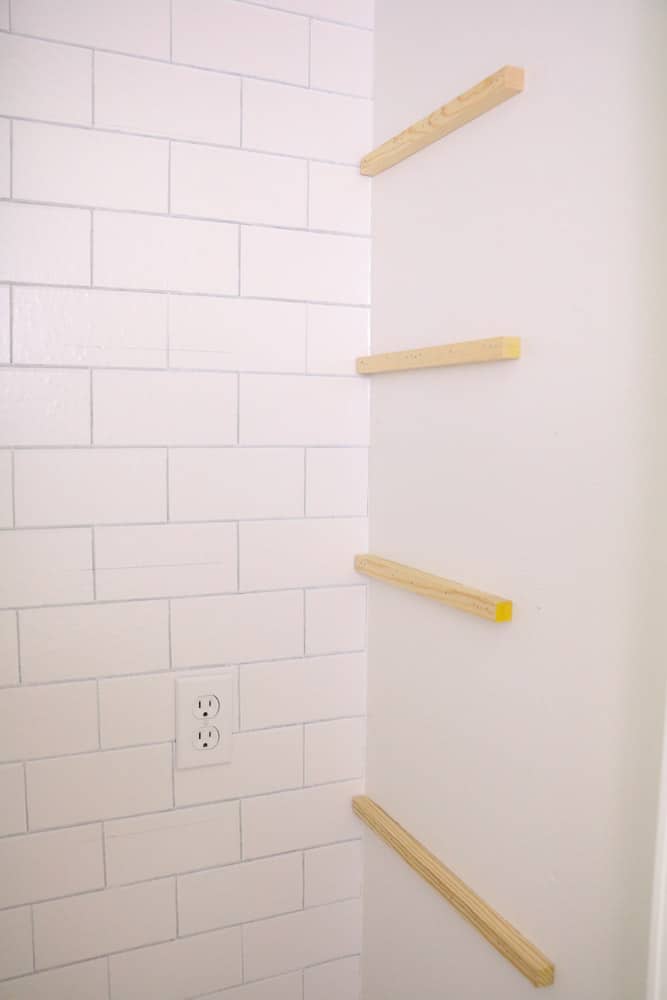

Make sure you run a dowel on the back wall too. This will give some extra support for your shelf so all the weight is not on the side dowels.
Spackle Holes and Paint Dowels
Once all the dowels are in place take some spackle and fill in the holes. Once the spackle is dry sand over them until it smooth.

Then take some of the shelf paint and paint the dowels that are hanging on the wall.

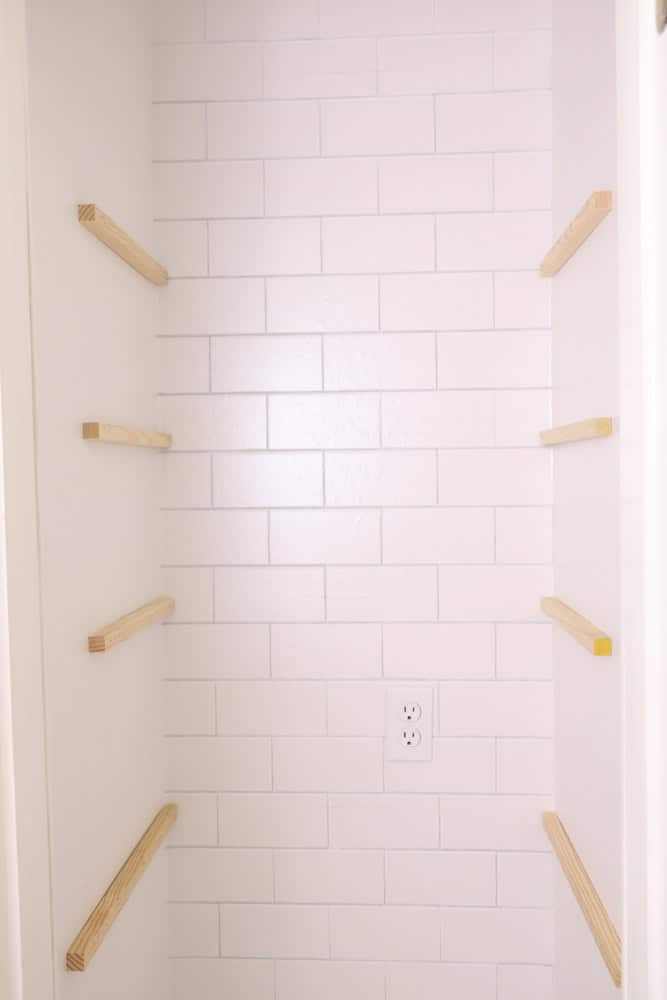
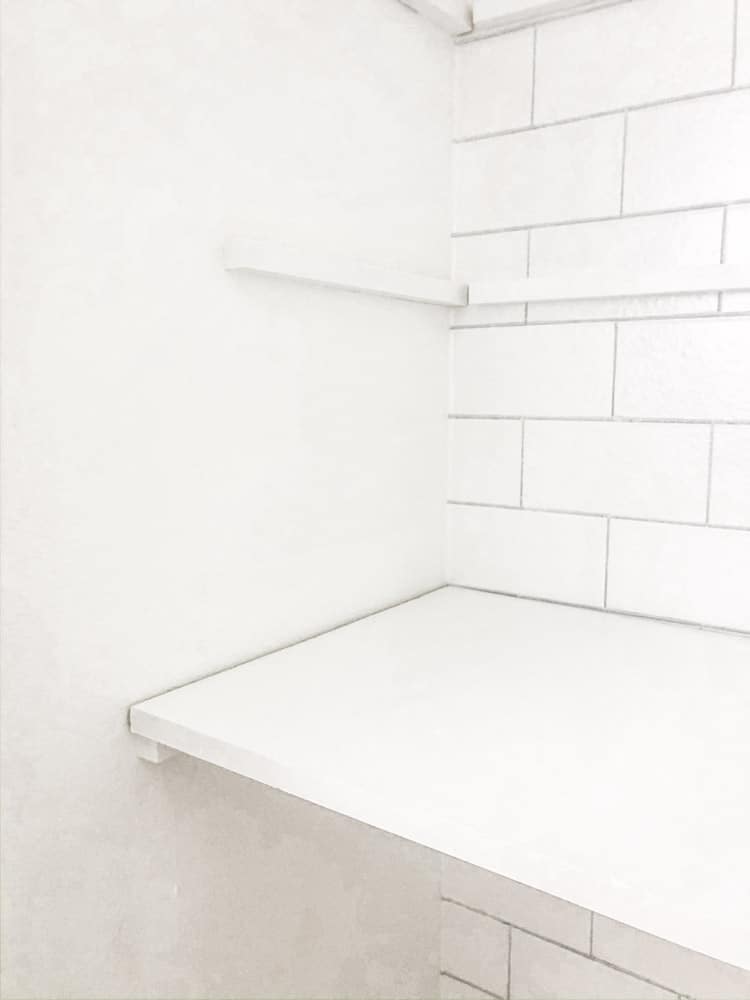
Hang Shelves
Are you getting excited? I was very excited at this point because I knew I was almost finished and the best part is decorating the microwave pantry.
Now place the shelves onto the dowels. Make sure the microwave shelf goes in the right place. Remember it is the deepest shelf.

Install Microwave in Pantry
Next, unpackage your microwave and plug it into your outlet. Nestle it in the middle of the shelf and make sure to remove any labels, packaging material and so on.

Accessorize the Dish Pantry
Well, by now you have figured out that this is not just a microwave pantry but it is a dish pantry too. Who knew when I started that this space would be so pretty and nostalgic.

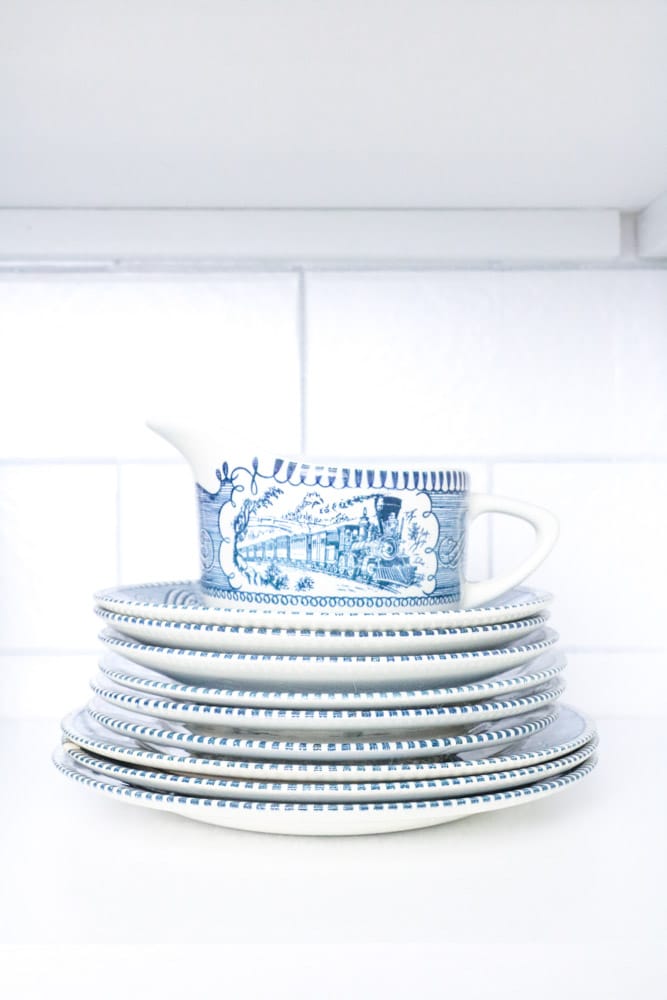
Now every time I open the door to put something in my microwave I will think of my grandma and her lovely ironstone Currier and Ives dishes.

You can fill up your shelves as much as you want with all your dishes or you can style it like a china cabinet or hutch. Here are some pointers on storing and displaying vintage dishes in a farmhouse hutch. This is a good place to start when styling your dish pantry.
And here are tips on kitchen zone organizing in case you are motivated to organize your kitchen.
Get the Look:
Conclusion
Can you believe we are finished with hiding the microwave? Not only did I do a hidden microwave in pantry project but I ended up with a dish pantry too.

I love how to wallpaper helped jazz up the closet and bring it all together with the kitchen.

I am so thrilled with the microwave pantry and even more thrilled that I can start planning the stove area next. So guess what is next on the agenda.
Yes, you guessed it–remove the microwave over the range.
For more DIY organizing projects for your kitchen try this DIY pot lid holder. I show how to organize your cookware cabinet and include a simple DIY on storing your pot lids on the inside of your cabinet door. You can also see how I transformed a closet into a pantry. It turned out beautifully and I think you'll love it.
Happy Decorating!


If you enjoyed this post, sign up to receive new decor ideas each week. FREE EMAIL SUBSCRIPTION
HOW TO INSTALL PEEL AND STICK WALLPAPER
Sunday 26th of April 2020
[…] to never hang it again until I learned how to install peel and stick wallpaper while working on a microwave pantry project in my […]