

All of us look for ways to make life easier; with this DIY mudroom storage unit, you can alleviate constant clutter and add function to your small space. We could not wait to complete this DIY project and show you how to add extra storage space within your home.

After my daughter moved into her house, this high-traffic area seemed to be the drop zone for anything and everything. We needed to come up with a way to make a DIY mudroom storage unit at an affordable price that could serve many purposes.
DIY MUDROOM STORAGE
In these 11 simple steps, we will show you how to create a charming storage space that is functional and practical for everyday life. The main purpose for this storage unit was a place to store shoes so shelving for shoes was a priority. They also needed a place to drop small items like keys and such so a basket or something was needed too.
Think about what your storage needs are and consider if this mudroom storage design is right for you. If it is then let's gather supplies and get started.
DIY Mudroom Storage Supplies
Before starting your mudroom storage project, here is a list of supplies you might need in creating your own custom DIY mudroom storage.
- Paint (we used Behr color Vine Leaf)
- Wooster paintbrush
- Paint roller frame with foam rollers
- Paint Tray
- Dropcloth
- Painters tape
- Pencil
- Level
- Measuring tape
- Lattice Strips (for both sides)
- ½” X 2” board (for the top)
- Wood for shelves (we used ½” thick birch plywood)
- Saw
- L Brackets
- Sander
- Tack Cloth (or paper towels dampened)
- Screwdriver
- Anchors and screws for brackets
- Pin Nailers or Brad Nailer
- Baskets and accessories for storage and decorations
Most of these items are currently laying around the house or garage. You can find all the painting supplies at Home Depot. Now let’s get started in creating your mudroom storage unit!


DIY Mudroom Storage Steps
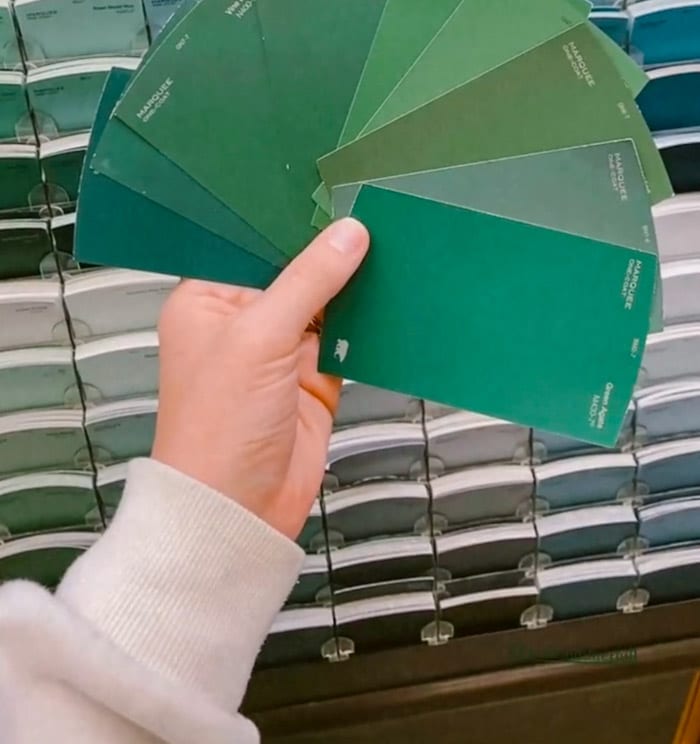
The first step in creating your DIY mudroom storage area is finding a paint color that best suits your space. In the supplies above, I noted that we used Behr’s color Vine Leaf in order to make this high trafficked area stand out. The paint we purchase is an eggshell finish. We wanted a matte finish that was washable so the eggshell was perfect. Here’s a list of the most popular Behr paint colors if green is not your color.

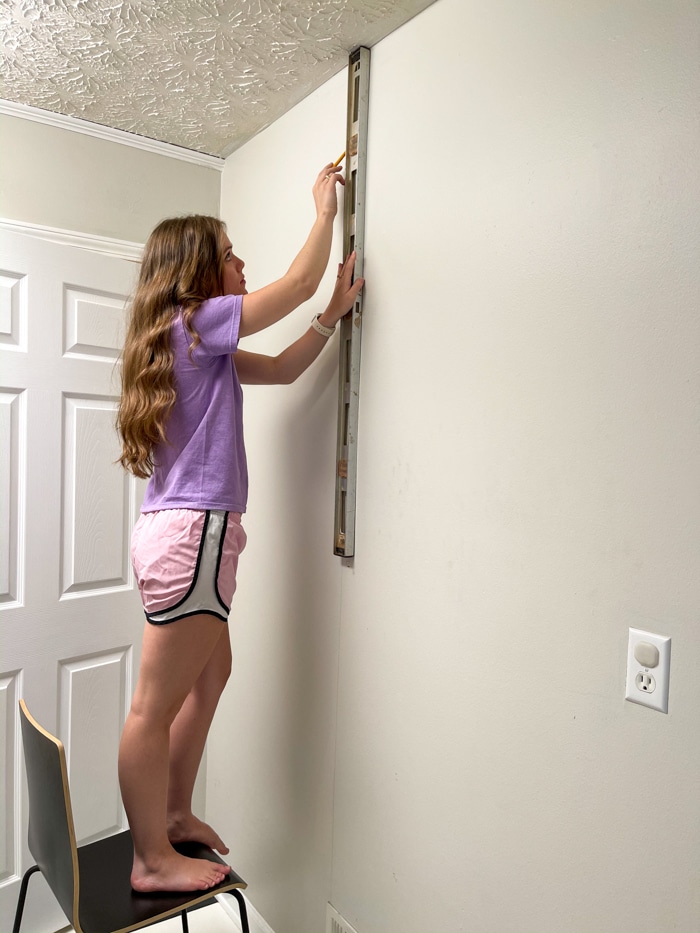
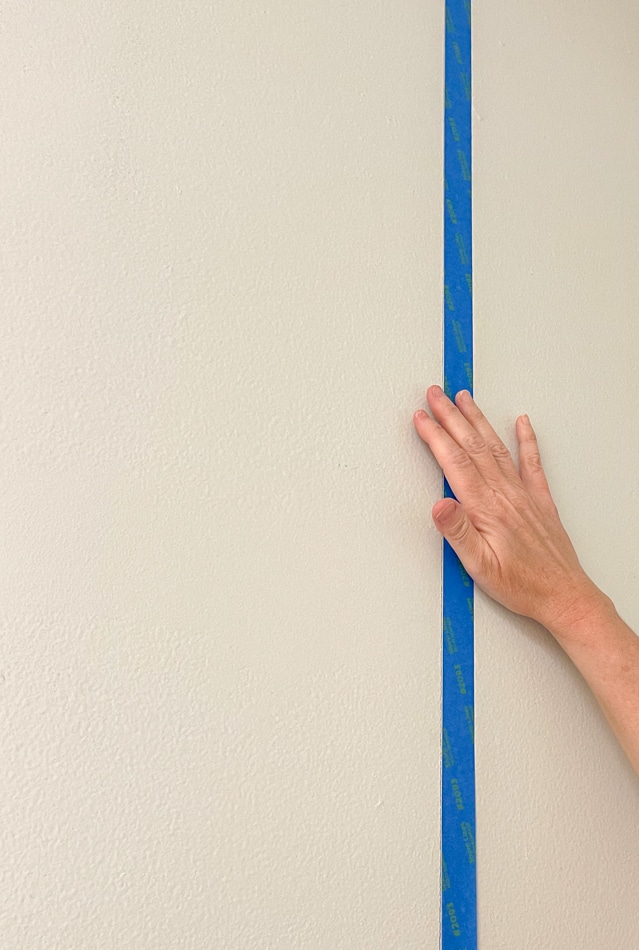
Measure & Draw Lines
Secondly, measure how wide you want your mudroom storage unit to be within the space. Use a level to draw a vertical line on each side with a pencil.

Painters Tape
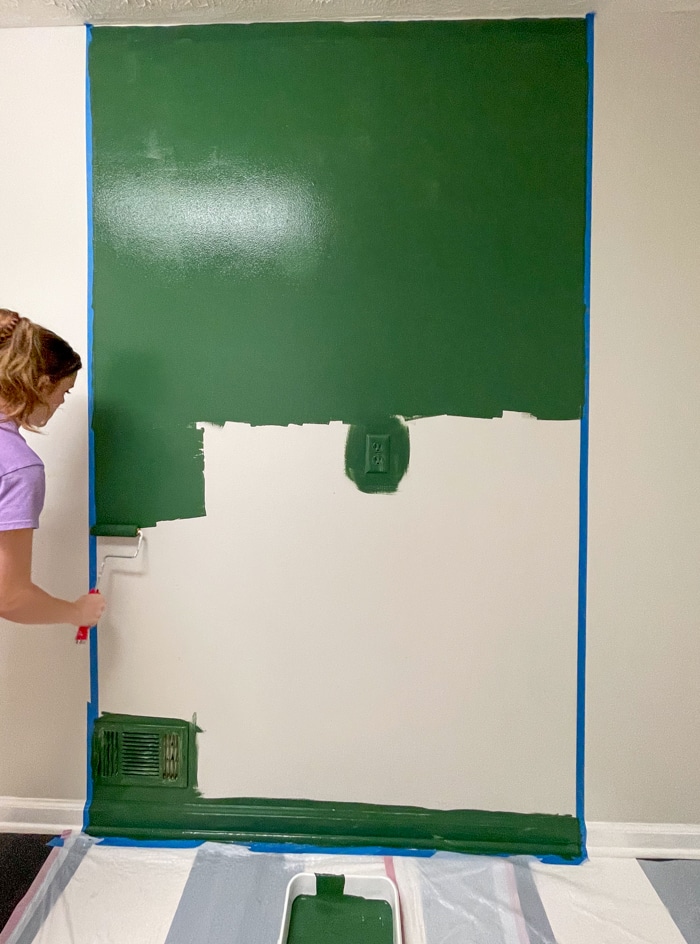
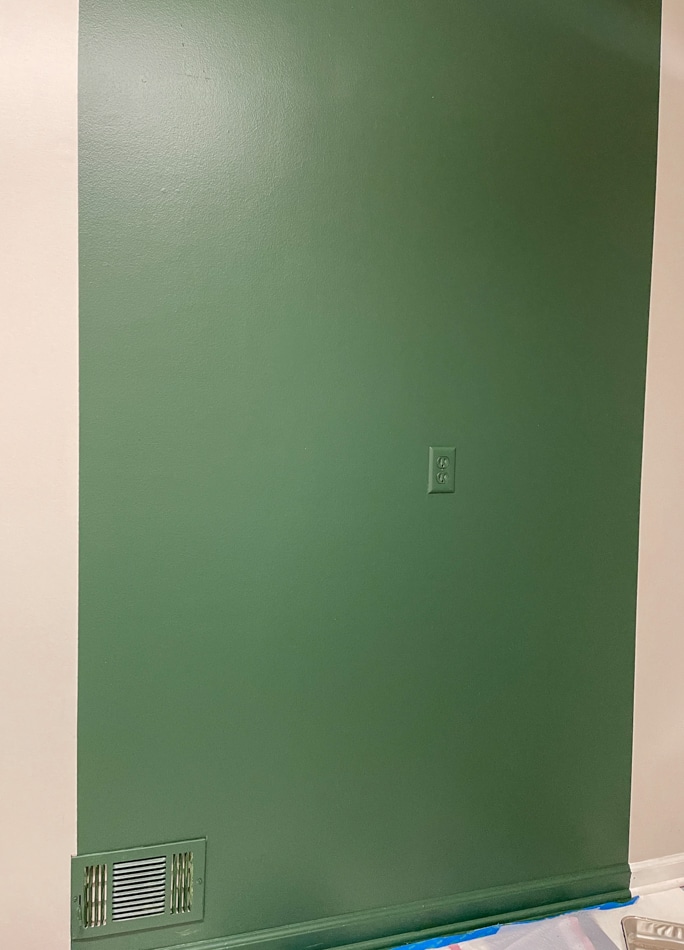
Next, you will outline your designated area for your DIY mudroom storage unit with painter's tape. Make sure you place the tape along the outside of the line and score the edge so the paint will not bleed under the tape.

Your wall will look like this once your painter's tape is up on each side.

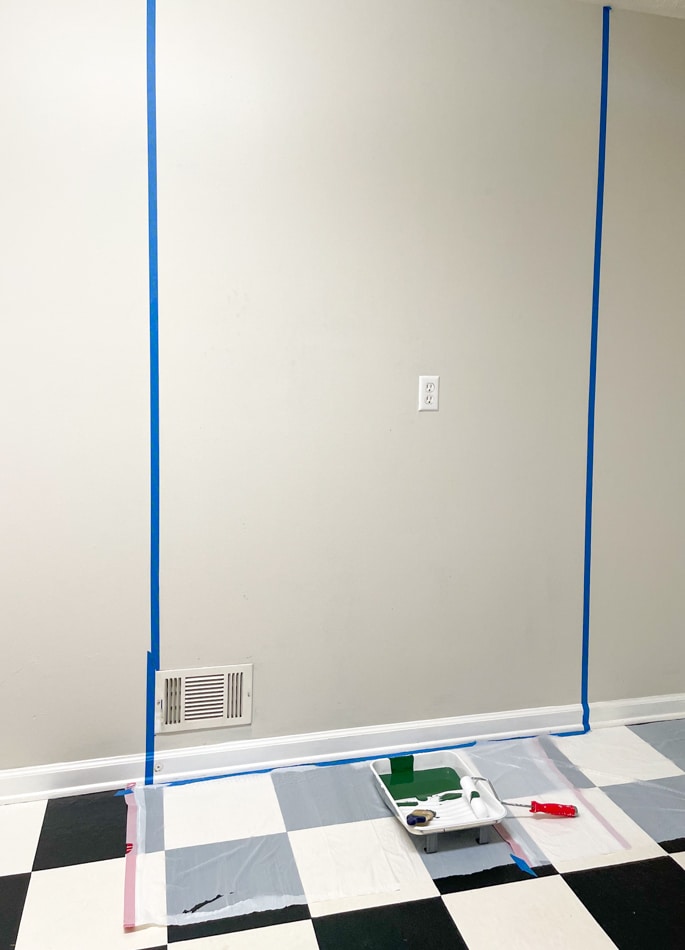
Paint Wall
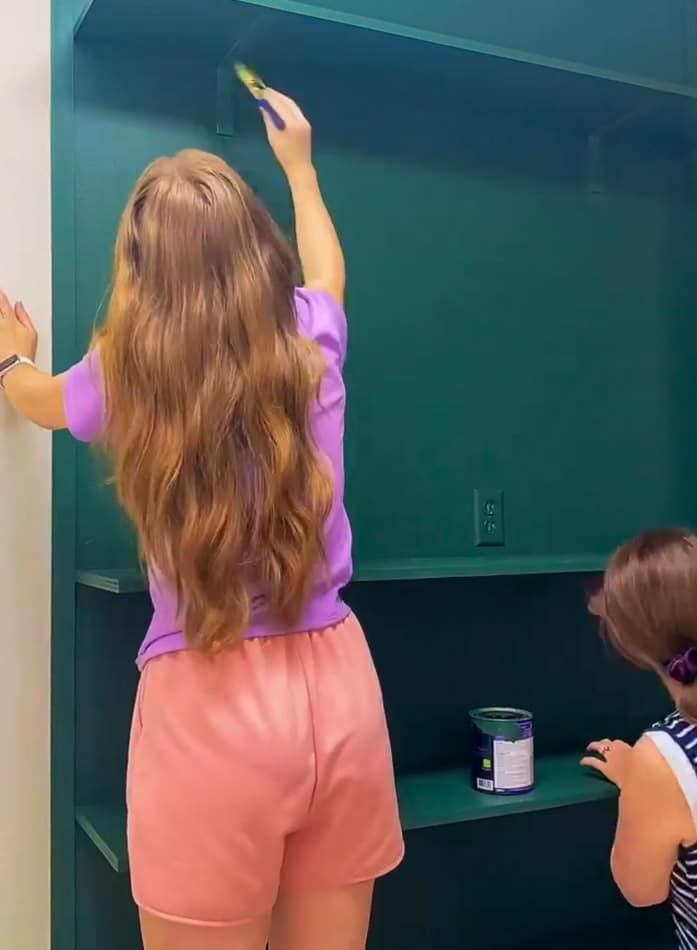
Now use your paint rollers to fill in between the painter's tape with your color of choice. We used a foam roller only because we have plans to paint the shelves with it.
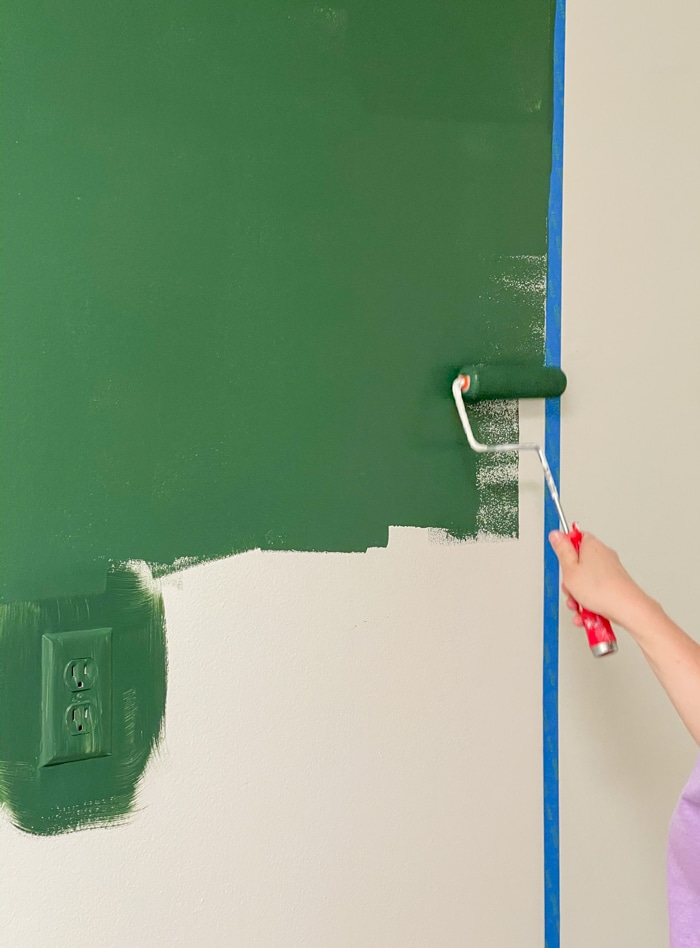

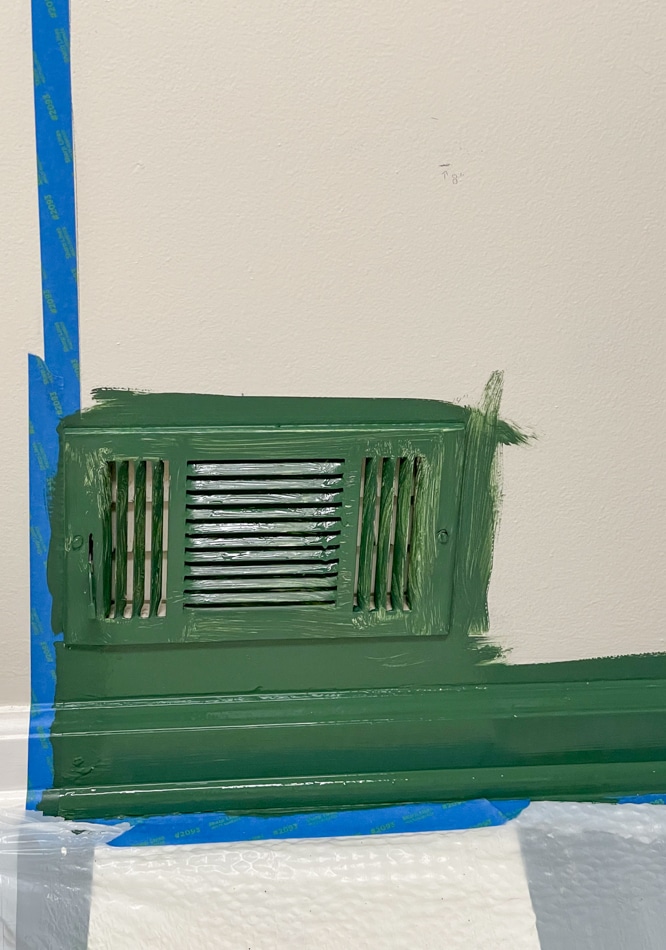
If you have any outlets or air condition vents go ahead and paint them the same color as the wall. This way they will hide in the storage unit.

We painted two coats of paint on the wall.

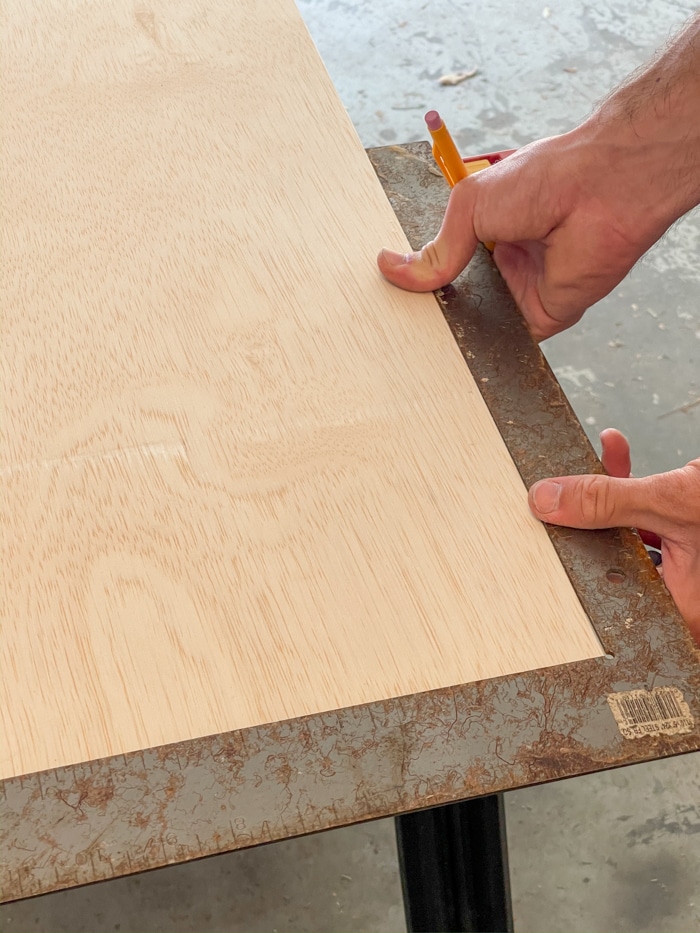
Cut Shelves and Boards
As you wait for the paint to dry, measure and cut the shelving and top board to fit the width of your painted area. Then measure from the ceiling to the floor and subtract the height of the top board to cut the lattice strips and cut the stripes.
Once the strips and shelves are cut to the appropriate length lay them on a flat surface to be painted.

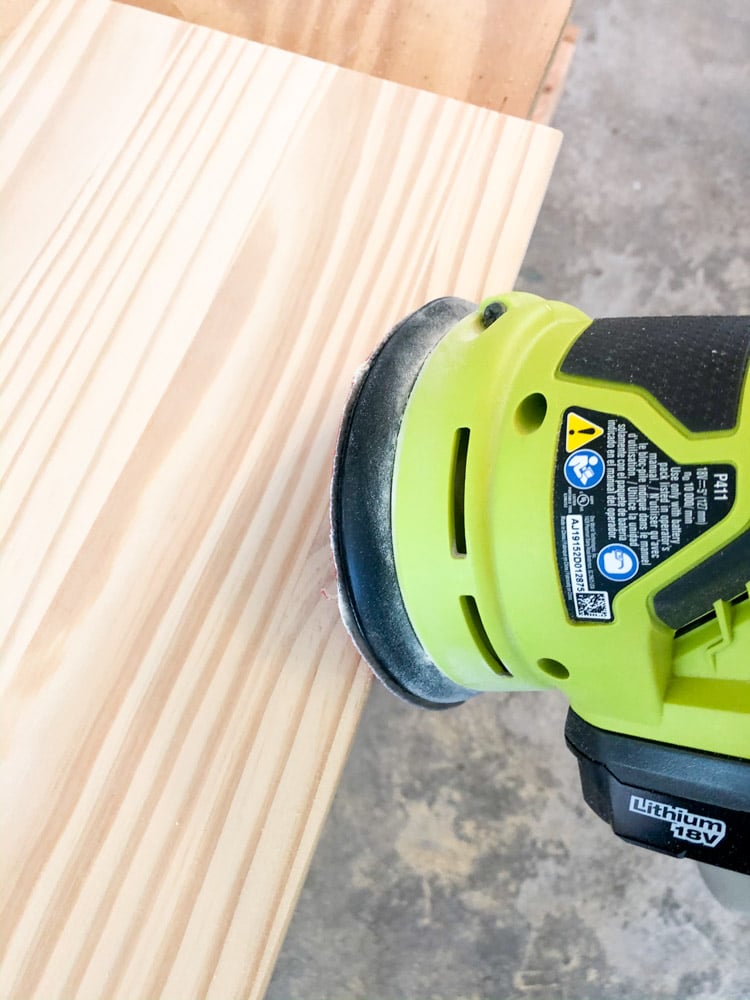
Sand Shelves
Once the shelving and top board have been measured to fit your painted area, sand them until smooth. After sanding, remove any sawdust with a tack cloth or damp paper towel.

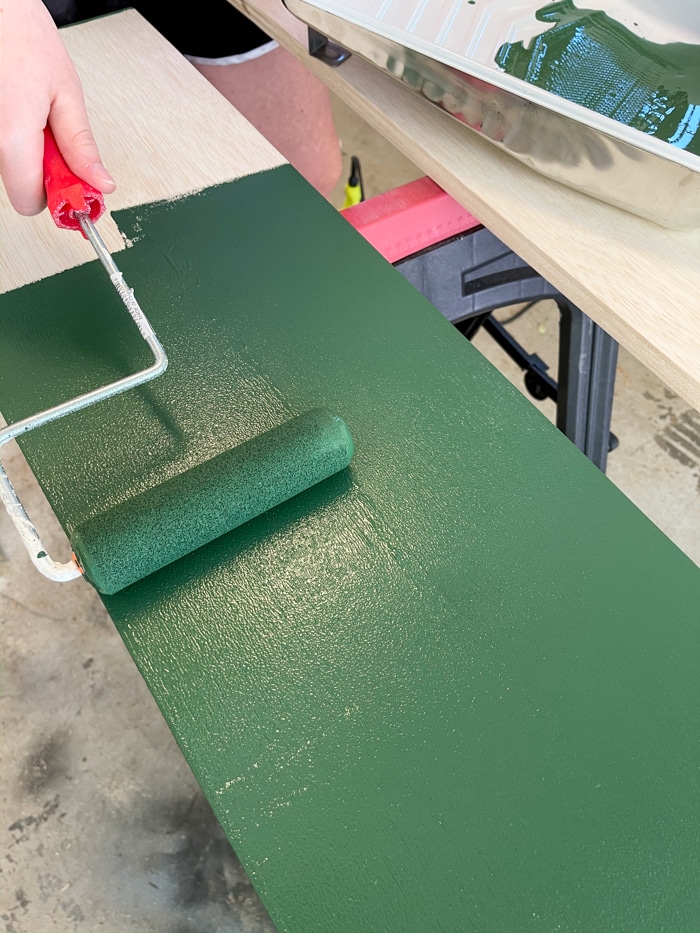
Paint Shelves and Board
Once all the sawdust has been disposed of, paint the shelving and the top board the same color to give it a seamless look. Use two coats of paint for a good solid finish. You do not have to paint them the same color as the wall but if you want the storage unit to look like a built-in then painting everything the same color will give it that effect.

Remove Painter's Tape
Next carefully remove the painter's tape. Make sure that the paint on the wall does not come away from the wall as you remove the tape. This is how your wall will look at this point.

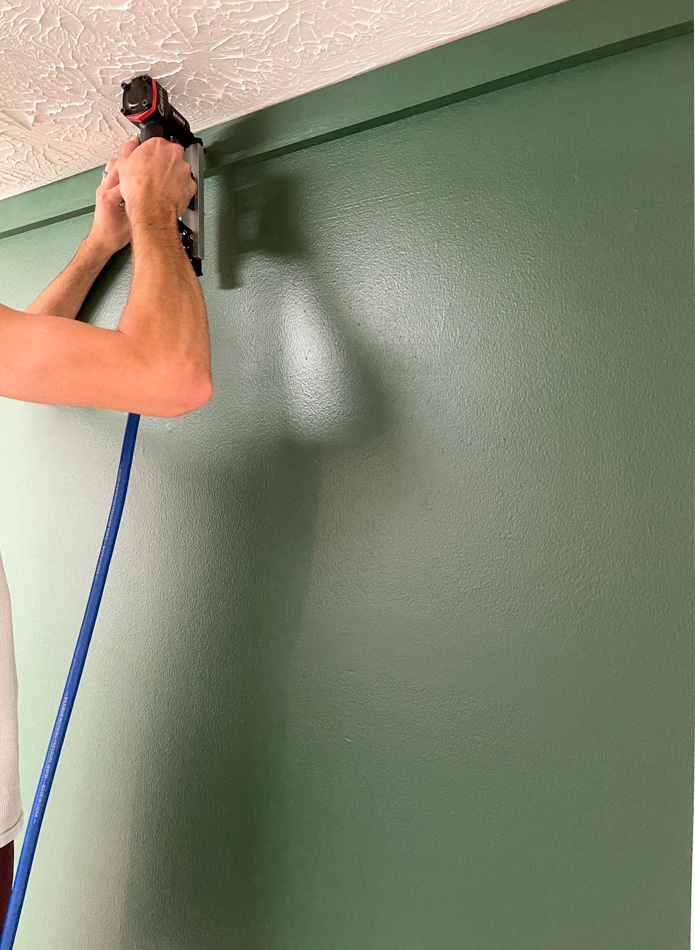
Install Top Board
After you remove the painter’s tape, attach your top board to the wall by using your nail gun. Make sure that it is up against the ceiling and flat against the wall.

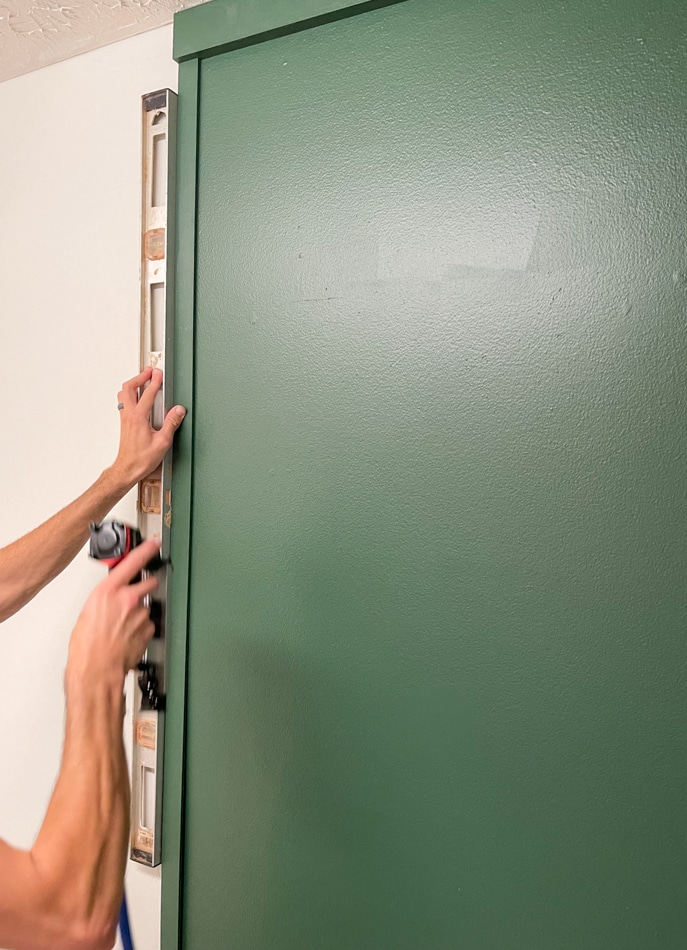
Install Lattice Strips
Once your painted area is dry, and you have replaced the painter's tape with the lattice strips using a nail gun, secure the strips to the wall and make sure that the lattice strips are in line with the top board. We used the level to make sure that the strips were vertically straight.

Install Shelves
If you are going to paint your metal brackets, make sure to clean them with alcohol. This will remove any unwanted residue the brackets might have from the manufacturer.
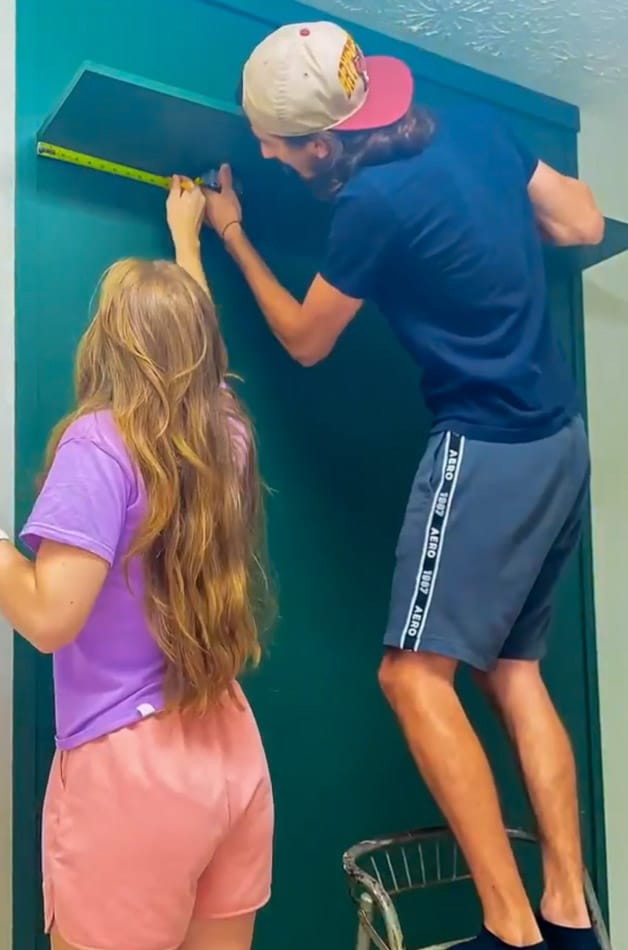
After the paint has dried on the shelving, hold the painted board to the wall and simultaneously use a level to ensure that the shelving is straight. Once you have leveled the shelves, take your tape measure and mark with a pencil vertical marks indicating where the brackets will go beneath the shelves.

We used anchors in order to make the shelving stronger for any type of decoration applied. If you choose to use anchors for your project, we used twist-n-lock drywall anchors. Now drill the holes and install the brackets and painted shelves.
Paint Brackets
After the paint has dried, hang the shelves and paint the brackets for a uniformed look.

Accessorize the Storage Unit
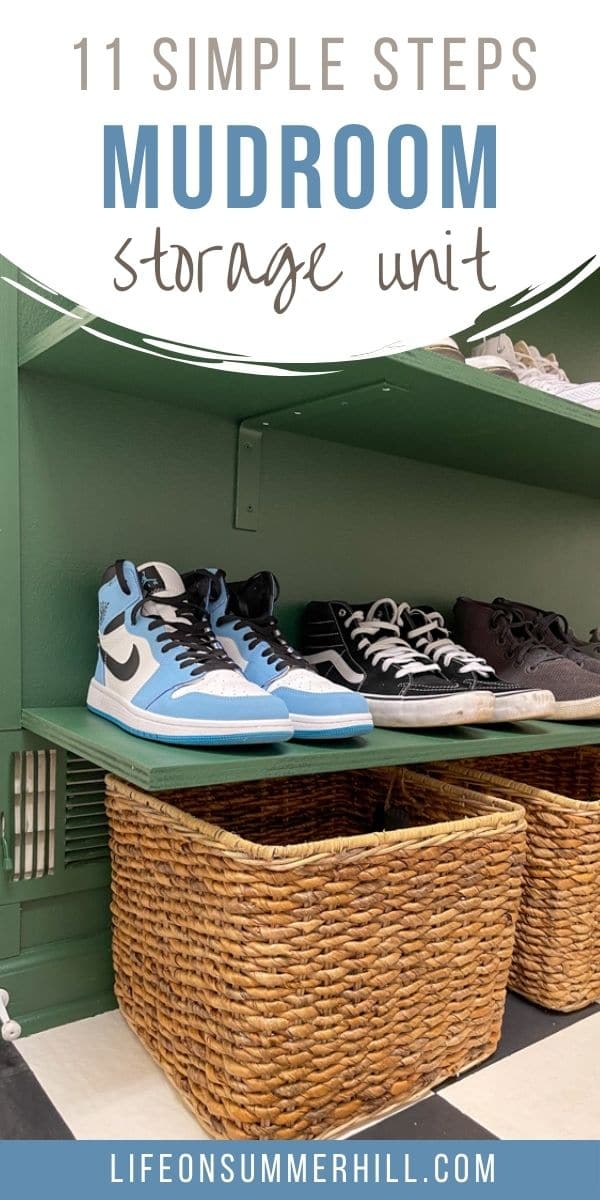
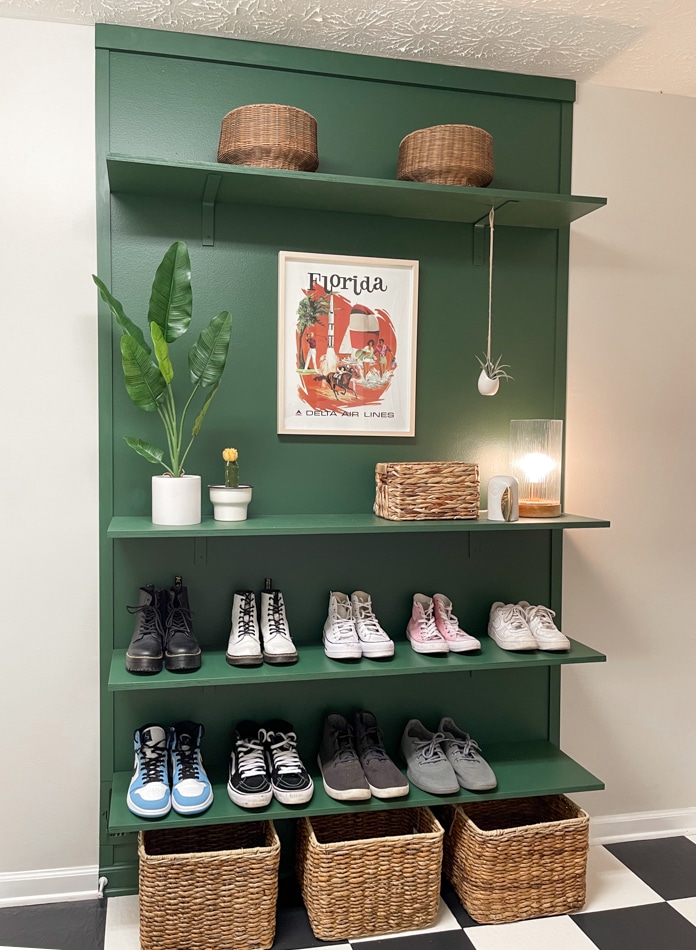
Your last step is to accessorize your storage unit. This DIY mudroom storage unit can be a great way to create extra space for storage in your home. As you can see in the picture below, our DIY mudroom storage space was used mainly for shoe storage. However, these shelving units are perfect for holding indoor plants, a basket for your keys/wallet, or any other item that might be in that particular “drop zone” of your home.
Conclusion
Now that you have seen just how easy it is to create your own DIY mudroom storage project, you might be wondering how you can tailor this mudroom storage unit to fit your family's needs.
If you are in search of paint colors for your space, here is a list of the top 10 most popular Sherwin Williams paint colors and popular Behr paint colors. But if you want to go green like we did a great place to start are these popular Sherwin Williams green paint colors.
Decorating your DIY mudroom storage unit can seem overwhelming when bare, so we wanted to give you some helpful tips in creating this perfect spot in your home. If shoes are a problem in your home, making this a shoe storage fix would be a great idea! We made sure that the shelving in our project was spaced far enough apart so that tall winter boots or even your everyday shoes would fit.

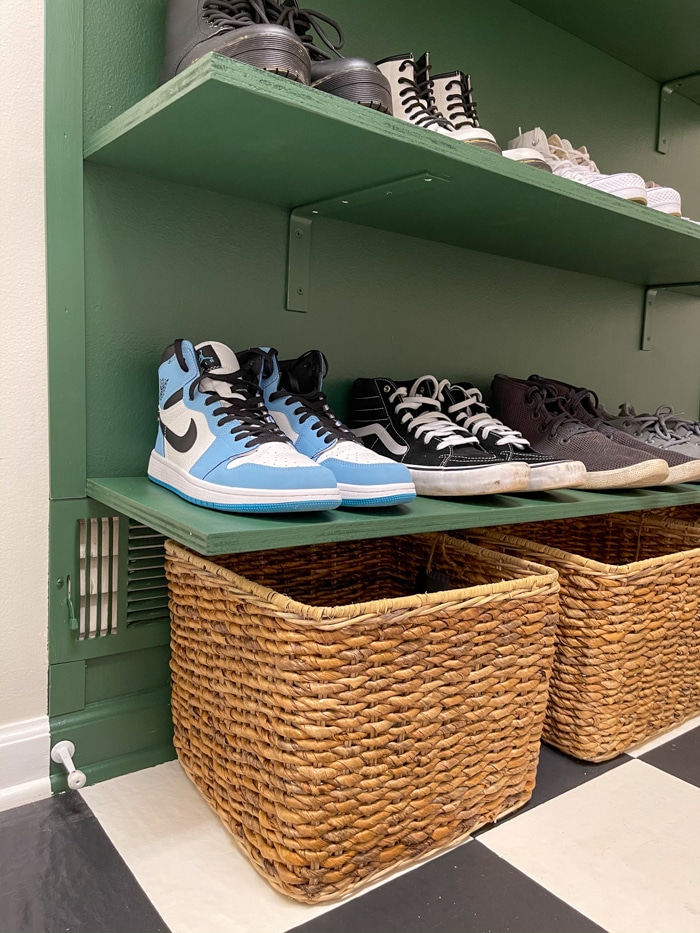
We also used wicker baskets at the bottom of the storage unit for flip flops or any other kind of shoe you may not want showing in your everyday view. The wicker baskets also help anchor the unit to make it seem more like a piece of furniture.
Decorative boxes which are sometimes the catch-alls can be great for keys, wallets, remotes, etc. If your DIY mudroom storage unit has an outlet that is within eyesight, you can take that decorative box and place it directly in front of where it hides that outlet but also allows for use if needed.


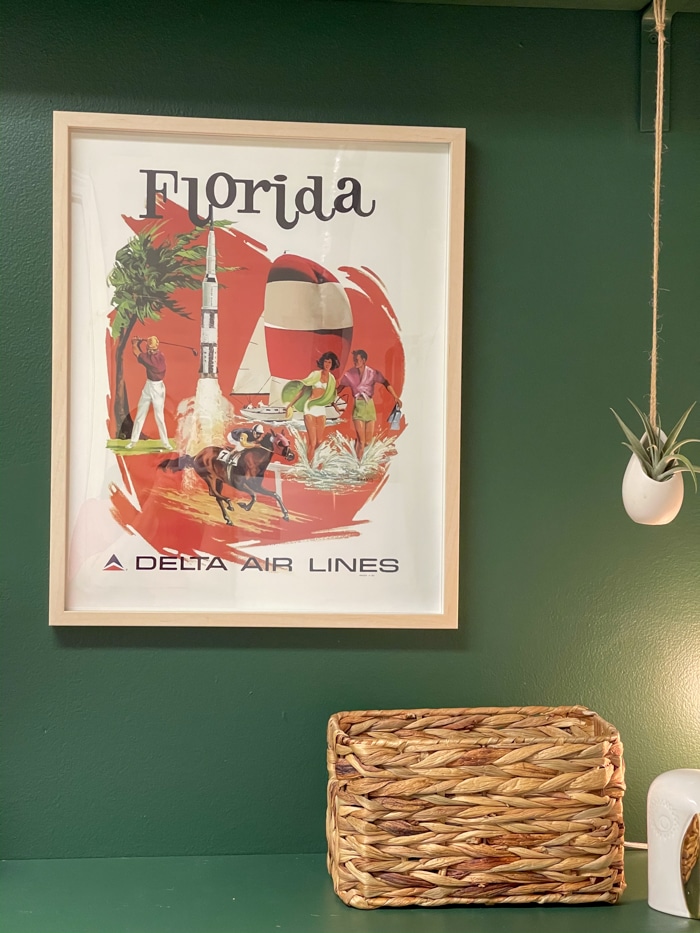
Another easy decorating tool would be incorporating a lamp if you are needing light in any particular space. In the picture above, you can see that we have placed a light on our DIY mudroom storage project which gives it that pop.
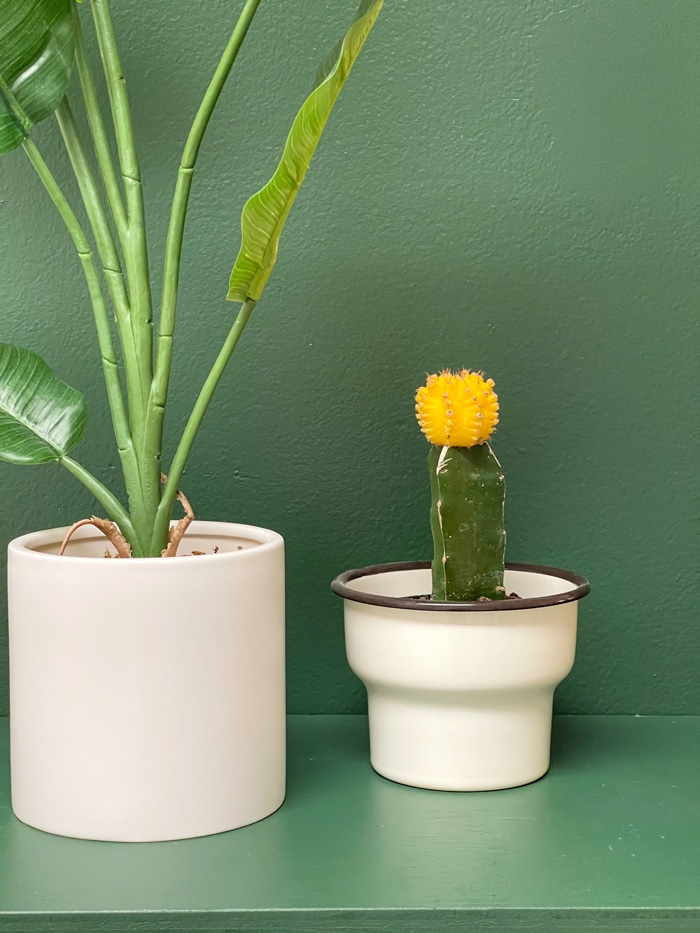
Flowers or greenery is also another great styling piece. You don’t want your greenery to be too heavy so try to keep it as simple as possible. Some great resources for greenery are small shrubs sold at Ikea. You can have your greenery but also keep it at an affordable price.

If you have a place to hang art this is a great way to add style to your built-in. We used a vintage piece of Florida advertising to give the room more color.

One final decorating solution you could use are hooks. If you have jackets, sweaters, or backpacks constantly lying around your home, a simple hook would alleviate that clutter and give it a designated space.
I hope you have found this DIY helpful and I hope it solves your organizational needs in your mudroom or laundry room.
Happy Decorating!


If you enjoyed this post, sign up to receive new decor ideas each week. FREE EMAIL SUBSCRIPTION
Amy
Saturday 19th of June 2021
Neat idea! It looks just like a built in cabinet.